Monday, February 9, 2015

Valentines Shrine - #21 Rock Candy Glitter Compendium of Curiosities iii Challenge and Feb. Tim Holtz Tag

I am participating in Challenge 21 of the Compendium of Curiosities iii Challenge on the Studio L3 blog by Linda Ledbetter. For Challenge 21 we are using the distress rock candy glitter technique as found on page 55 of Compendium of Curiosities 3 by Tim Holtz. Challenge 21 is sponsored by Inspiration Emporium who will provide a $50 shopping spree for the winner of the challenge, with more prizes courtesy of Tim Holtz and Mario Rossi for the fabulous Curiosity Crew's choice winner!

Combined Projects
Before starting this challenge, I was really liking the February Tim Holtz 12 Tags of 2015 collage background technique! I decided to use the collage background for my Compendium of Curiosities iii Challenge project along with the distress rock candy glitter technique!  So I combined the two projects!

Old World and Vintage
I wanted to make something old-world architectural so I stuccoed my rock candy glitter panel to the background with crackle paste. For the background I followed the February Tim Holtz tag almost exactly using Tim Holtz Ephemera.


The Shrine Panel
Here is a close up of the Rock Candy Glitter Technique on the shrine red/pink panel background. To find out how to accomplish this you have to read page 55 of Compendium of Curiosities by Tim Holtz.

All I can say is I started out with this.

The Heart
I can tell you about the heart as it doesn't use the Rock Candy Distress Glitter technique. It's just a thick foam heart. I cut the edges of the foam heart with scissors to make it look carved then painted it white. I stamped it with black archival ink. Then I used distress stain and paint to antique the heart. The cherub is a resin doll head painted with alcohol ink and antiqued with paint.

Background Embellishments
Here are some of the embellishments. The arrow and heart charm is from the February Tim Holtz tag.

I used a Tim Holtz Industrial Frame Sticker. Instead of a felt heart I created a heart cut out of 2 sections of lace. I created a patina on the crown charm with distress paint.

This 14 charm is a metal jewelry finding that I added a paint patina to. For the number 14 I used plastic clock face numbers. I put gold stickles into the little gem cups on the jewelry finding.

This "V" (for Valentine and Vic) embellishment is a jewelry charm along with a paper rose in a tussie mussie jewelry finding. I like how the charm looks like a wax seal. There is a chit-chat sticker and some lace and burlap ribbon.


Here's a side-view of the Tussie Mussie so you can see the dimensional objects and the crackle paste stucco. I made the chain tassel out of jewelry supplies.

I used a Tim Holtz clock key on the side of the tomb panel. There is a small glass bottle that I decorated with a round brad that I cut the top off of and glued onto the bottle. I filled the bottle with some glitter.

Here's top view so you can see the dimensional objects better.


All Framed
I had a lot of fun making this old world project. I like the combination of old world and the new vintage like the old cathedrals I visited once on a trip. There were many layers of history as the old and new were combined over the years. I decided to frame it so I can hang it up. All of the elements are symbolic to me in some way and tell a story. I could tell you my story, but it's better for you to find your own story in the project. =)


Fueled by your projects
Thanks to Tim Holtz for the awesome collage background and embellishments from the February tag tutorial! Since I have been participating in the Compendium of Curiosities iii Challenge, I am delighted now to have taken the time to create many interesting projects practicing so many different techniques! Thanks to all of you who have inspired me to keep going when I can't think of anything to make or when I'm just too pooped to be creative!!! I see your projects and they give me the will to keep on!

Eat some chocolate
Now go eat some Chocolate in honor of Valentines Day! The first rule of Valentines Day is to love who you are and eat some chocolate! Only then are you free to share!

Saturday, January 31, 2015

Jan 2015 12-tags - New Years Flower Pot

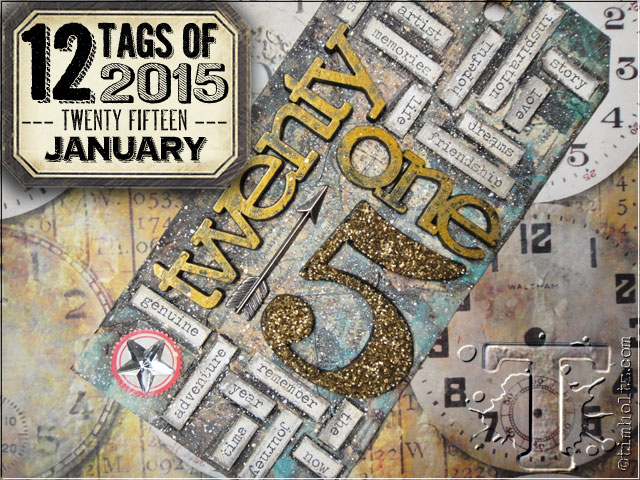
http://timholtz.com/12-tags-of-2015-january/

I have been playing along with the Tim Holtz 12 Tags of 2015. This month flew by but I didn't want to miss making the January tag, so I finished this up today! Instead of making my January tag, I have been playing with my new grandbaby born in January! So much fun!

Instead of making a tag this time, I decorated a clay pot using the same techniques as the Tim Holtz January 2015 tag tutorial! I also added a 3D tattered flower using the same tissue paper on a manila folder.

It's kind of funny seeing the Tim Holtz tag design on a flower pot, but it works!


I started with a plain clay pot, then decorated it with Tim Holtz tissue paper, distress paint, distress spray, the same as the tutorial. It took awhile for the tissue paper to dry, so I was patient and worked on my flower while it dried.

 I cut out some pieces of manila folder the size of the tattered floral die, then glued the tissue paper on the manila folder.
After cutting out 4 large flower pieces, I used distress paint and some distress spray to color my flowers.
I also colored the backs as they might show when making the flower.

To make the flower I followed a tutorial by Hels Sheridan. She makes the most beautiful flowers! Check out her blog "Ink on My Fingers" to see some of the most beautiful Tim Holtz style projects and amazing flowers!

I glued the flower onto a paper party straw that I distressed with distress stain. Then I inserted the straw into a wooden spool so it would stand up.


Here are my various "chit-chat" words for 2015.


I had fun distressing the word "one" following the tutorial, and glittering up the number 5.

More "chit-chat" words. I couldn't find my Tim Holtz "chit-chat" stickers so I had to make my own. I have them somewhere. (Maybe I should have added "get organized" to my 2015 words, but that's no fun!)

So even though I didn't make a "Tag" this time, I have a cool decoration that makes me happy and I finished it just in time.

Thanks for checking out my project!

Here is the beautiful baby girl! I've been having so much playing with her. Isn't her hair amazing!
Grandbabies make the world go round! Oops, she's missing a mitten, and one sock. So cute!


Friday, January 16, 2015

Compendium of Curiosities iii - Challenge 19, Eclectic Ellie Doll!!!

I am participating in Challenge 19 of the Compendium of Curiosities iii Challenge on the Studio L3 blog by Linda Ledbetter. For Challenge 19 we are using the Tim Holtz Eclectic Elements Fabric and the frayed fabric technique as found on page 66 of Compendium of Curiosities 3 by Tim Holtz.
Challenge 19 is sponsored by Inspiration Emporium who will provide a $50 shopping spree for the winner of the challenge, with more prizes courtesy of Tim Holtz and Mario Rossi for the fabulous Curiosity Crew's choice winner!

For this challenge I wanted to make something cool using many of the Eclectic Elements fabric designs all incorporated into one fabulous project. Since I know how to sew, I decided since this is a fabric challenge, I would sew a fabulous 18" doll dress made entirely of Tim Holtz Eclectic Elements fabric using a vintage reproduction doll dress pattern from Butterick.

I have been working on an 18" Steampunk dolly that I have named "Eclectic Ellie" who will be modeling my designer dress. "Eclectic Ellie" is not quite done, as she does not yet have a face...or hair, but since she's Eclectic, it all works!

Here is Eclectic Ellie modeling the dress!


Here is a close up of the Frayed Fabric technique on the front dress pocket.

I wanted to show that you can take a cutesy 1950's doll dress and using Tim Holtz Eclectic Elements, it turns all hip and modern, but still vintage and retro.
My dress is the same pattern as this:

But look at what I did to it:

I love the bottlecap design on the sleeves, collar and waistband.


I also love the bow tie in the back in the contrasting design, same as the underskirt.
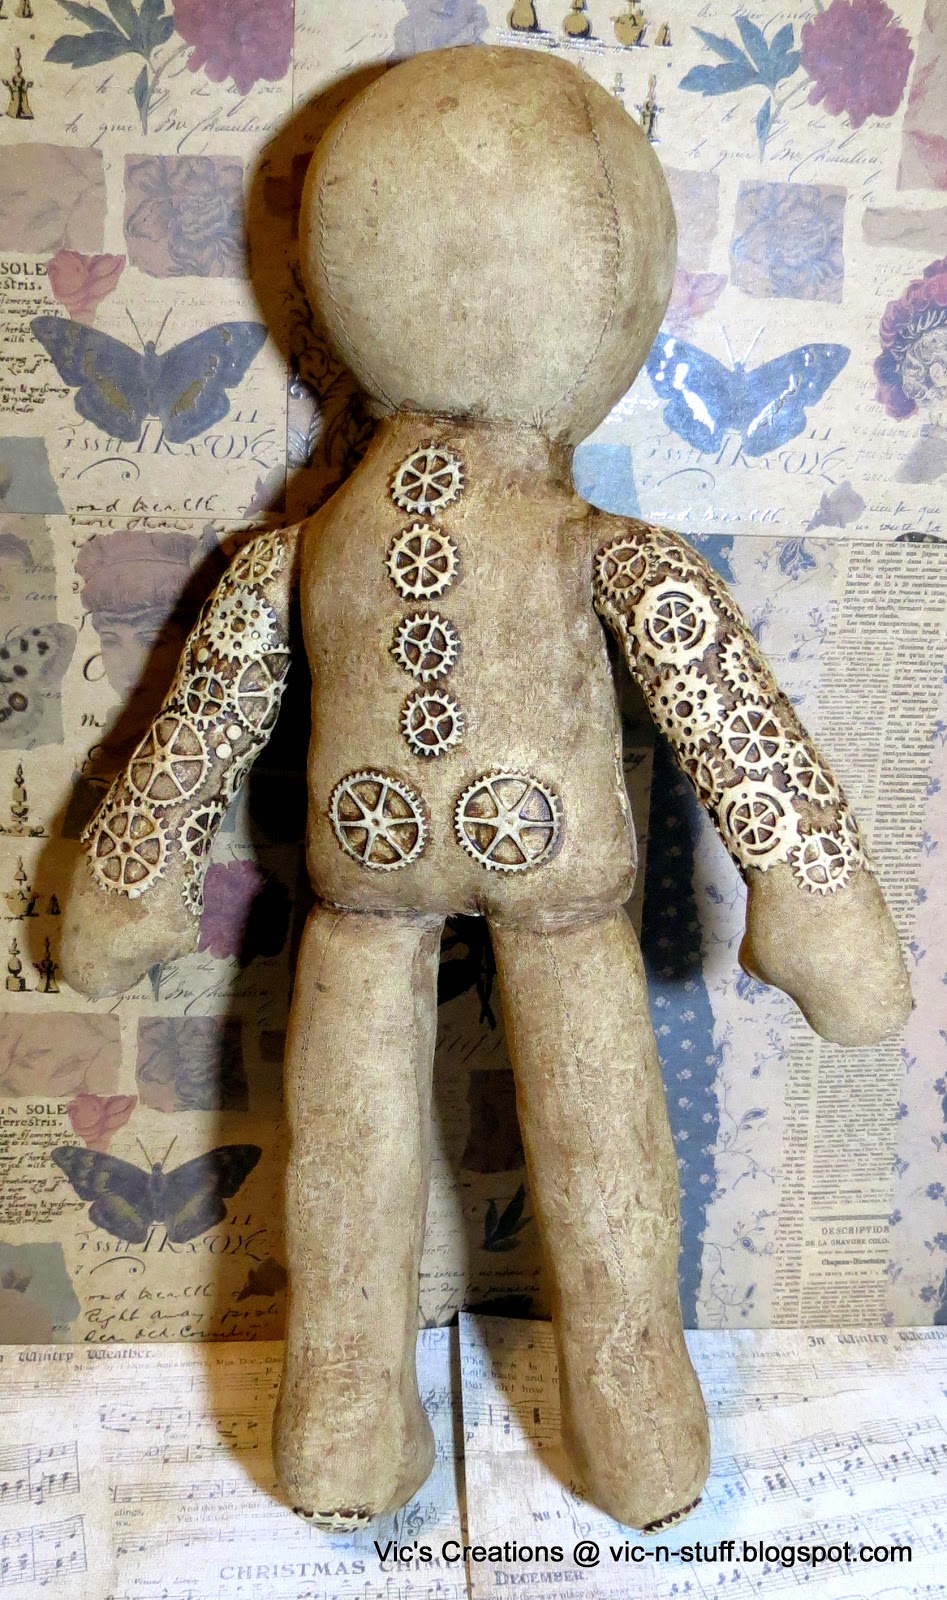
Here is "Eclectic Ellie". She's an 18" doll form that I'm decorating with dies, stencils and paint.

 Yes, that is an elephant on her tummy. She's feeling a little bloated. LOL!
This is her, um, back-side, and spine.
 Eventually she will have a face and rosy cheeks. Oh, and some hair. Probably fabric skeewampus hair. Maybe some fabric dreadlocks, not sure yet.


Oh, I wanted to show you her knees.


So thanks for checking out my project!

Since most of the participants say they don't really sew, I wanted to show you all something slightly different that you can do with a normal doll dress pattern and Tim Holtz Eclectic Elements Fabric, and a simple pre-made doll form that you can buy at a craft store. It's all art, just the same, just a different canvas, and a different medium.
It's amazing how the Tim Holtz Fabric totally changes the look of the dress and it suddenly becomes art instead of a toy.

Do not feel bad if you are not a sewer! What all of you make look so simple I have to work so hard at. But this I can do...

I learned to sew when I was 13 years old thanks to my best friends mom who worked in a fabric store. She gave us a sewing machine, old fabric, and discarded patterns and left us on our own. My friend immediately sewed through her finger, nothing serious, just got the side. We made some extremely ugly creations, lopsided dresses, 70's pant suits with zippers on the behind (talk about a wedgie), and some really horrible swim suits. Eventually we figured it out!!! Through trial and error, no classes, and no instruction from anyone! It was a simple singer sewing machine with only a straight stitch. My parents then got me a simple sewing machine too, which I used until it quit working a few years ago.

I will post again when I finish up "Eclectic Ellie" and then I can post a tutorial on the doll. It's pretty simple. I used a gear die with craft foam and glued the gears on the doll, used some stencils and stencil paste, painted the whole doll with acrylic paint in a lighter skin color, then antiqued over the entire doll with a brown antiquing medium. That's it.

The dress will fit any 18" doll, but I'm liking the dress on "Eclectic "Ellie"!

Sunday, December 28, 2014

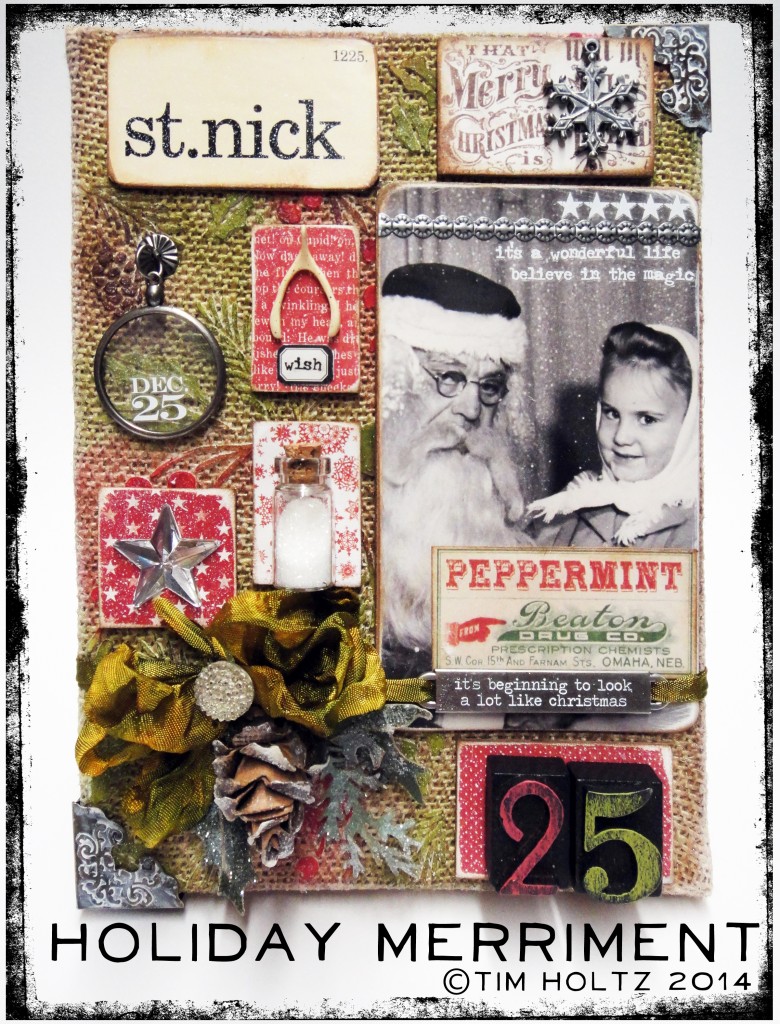
My completed Tim Holtz holiday Merriment canvas project!

http://timholtz.com/holiday-merriment/
When I saw the above Tim Holtz Holiday Merriment canvas mini-class on the Tim Holtz blog I knew I wanted to create the project even though Christmas was a few days ago. After Christmas and all the rushing around at Christmas I looked forward to making a project without having to think up anything. I didn't have some of the supplies so I had fun improvising!

Here is my finished project!!!

I didn't have the found relatives occasions, holiday flashcards, or holiday ephemera and it's hard to find those items anywhere after Christmas as they seem to be all out of stock at this point so I found my own substitutions. I had most of the other items so I was able to create the project using the instructions from the Tim Holtz mini-class on his blog!!!

I found my own vintage girl with santa "christmas relative" on the web here. I found the candy canes wrapper ephemera here at littlemisscelebration.com. I didn't have a Tim Holtz monocle so I used a Tim Holtz fragment (clear plastic tag) and stamped on it because I didn't have the Christmas remnant rubs. The stamp didn't work so well, so I fixed it up carefully with a sharpie.I sprayed the back of my "fake monocle" with icicle spray for windows to make it frosted with ice crystals on the back, then I painted around the edge with silver paint for model cars. I glittered around the "christmas relative" and the fake monocle. I wish I had a Tim Holtz holiday word band, but I didn't so I used a different word band. I added some bottlecaps I made using vintage images.

For the rest I followed the instructions on the Tim Holtz blog using the same supplies as Tim.

I love, love, love this project!

Thanks Tim for the free mini-class! I am happy that I was able to complete my mini-class project in the comfort of my own craft room and it was tons of fun to make!

Tuesday, December 23, 2014

My frozen version of the Tim Holtz Merriment Clock Project!

https://www.etsy.com/transaction/248367834
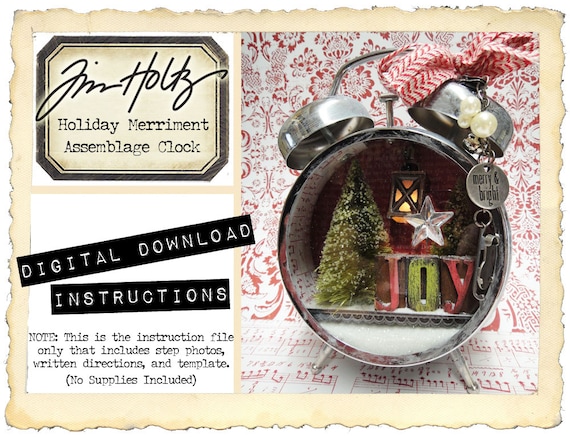
I really wanted to make the Tim Holtz Holiday Merriment Assemblage clock that he made available on etsy, but the kits were sold out, so I was glad Tim made the instructions available to purchase.

I purchased the instructions and provided my own supplies and made this "Frozen" version!


It's hard to photograph with all the sparkle and the glare from the glass, but I'm so happy with how it turned out. The instructions were easy to follow!
Here's how I decorated the outside of the clock.
I coated the clock with the spray for windows that turns them temporarily to crystal. Then I wiped it off the glass with alcohol, but it gave a nice effect to the clock "bells". Then I covered the outside of the clock with decoupage glue and crystal glitter. Kind of a messy trial and error process. For the inside of the clock I followed Tim's instructions. The only thing different I added was a little porcelain penguin figurine. So cute!

I added a really big silk flower and a bow at the top!

I am very happy I got to try the Tim Holtz clock project from his etsy shop instructions! I feel like I went to one of his classes!

Here are some more photos.


Looks like a blinding snowstorm is going on inside the clock!

Brrrr, looks cold in there! Love the little dangle of charms on the side!
Merry Christmas and a Happy New Year!!!

I'm enjoying my frozen wonderland now, but soon I'm heading off to Disneyland where it's warm! Yahoo!

Sunday, December 21, 2014

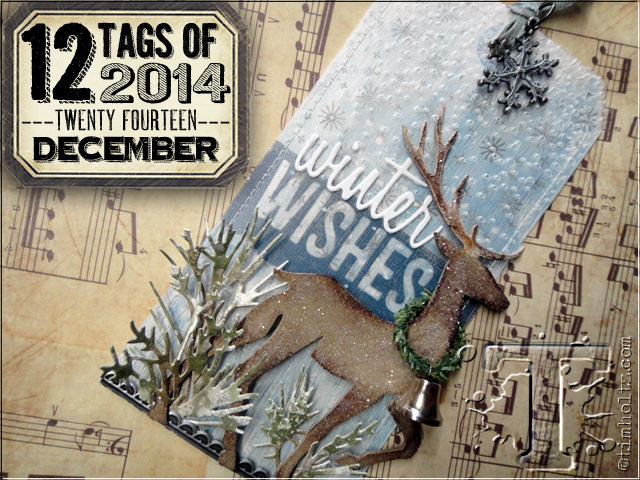
December 12-Tags, Wintery Prancing Deer


http://timholtz.com/12-tags-of-2014-december/
I'm playing along with the Tim Holtz 12 Tags of 2014 shown above. I love Tim's December tag so I kept it about the same so I could practice the techniques. This was a fun one!

I  purchased the prancing deer die and was excited to try it out! I had fun with the background speckled snow technique but you can't see it in the photo. I didn't have any of the new frosted embossing plastic so I improvised with a piece of plastic packaging covered with Tim Holtz frosted film. Then I embossed that with the snowfall embossing folder and it kind of worked!

I also didn't have any of the word dies, but I do have the individual letter dies called thinlits - alphanumeric so I spelled out the word wishes and die cut it. Then I used ranger texture paste and the Tim Holtz Christmas stencil to create the jingle word over the top of the plastic. Then I covered the paste with glitter. I was in a Christmas glittery mood today, so I really went crazy with the glitter! I love the glitter.

So you can't tell how sparkly this tag is in the photo, but it really sparkles!


I didn't have the new Holiday Greens die, so I used the Festive Greenery strip die instead. I also wanted to try out some fake snow goop I just purchased so I decided to insert the greenery into the snow, and then douse that with glitter! I had a green bell but it was too bright so I toned it down with white alcohol ink mixative, and sprinkled that with glitter!


So I was just living it up with the frosted, snowy and glittery theme. I like how confident the prancing deer looks even though in my tag he looks slightly frozen due to all the ice (glitter) on his coat. =)
The prancing deer is now one of my favorite new dies!

I enjoyed making this tag and am very happy to have completed all 12 tags of 2014! I look forward to many more creative projects next year!

Merry Christmas!!!


Wednesday, December 17, 2014

Compendium of Curiosities iii, Challenge 17 - A Merry Mouse with Woodlands and Tinsel Twine

I have been having a blast participating in the Compendium of Curiosities iii Challenge on the Studio L3 blog by Linda Ledbetter. For Challenge 17 we are using the Tim Holtz Woodlands and Tim Holtz Tinsel Twine technique as found on page 60 of Compendium of Curiosities 3 by Tim Holtz. You can choose your trees from either the Woodlands Tree Lot, or Smaller Woodlands package.You can use Tinsel Twine in your project instead. I used both!
Challenge 17 is sponsored by Inspiration Emporium who will provide a $50 shopping spree for the winner of the challenge, with more prizes courtesy of Tim Holtz and Mario Rossi for the fabulous Curiosity Crew's choice winner!

A Very Merry Mousey Christmas


I decided to make a little woodlands Christmas scene for my project. How cute is this mouse?!!! I found the pattern in Barbara's etsy shop bvoe668! So adorable and it wasn't hard to crochet. I dressed up the mouse with some Tim Holtz trimmings! 
The pattern has the mouse resting in a crocheted walnut shell! So cute, I can't stand it!


https://www.etsy.com/listing/76772276/pdf-crochet-pattern-tiny-mouse-in-walnut?ref=sr_gallery_1&ga_search_query=crochet+mouse+pattern+walnut&ga_search_type=all&ga_view_type=gallery


Woodlands Tree's are addicting!
I'd never tried the woodlands tree technique before and it was pretty easy and fun. I had a purchased spool and decorated the spool and the tree. I used the tinsel twine technique at the bottom. I've seen the Tim Holtz display of all the Woodland trees in every distress ink color. Now I know why, you just can't stop at one color!


Mousletoe gives you a present!
My daughter named the mouse Mousletoe! I made the second smaller spool to look like the purchased spool. I got a regular wooden spool and added two wooden wheels and painted them like the purchased spool. I wrapped it with twine from the hardware store. The mouse scarf is some Tim Holtz Merriment trimmings ribbon. I made the hat using the trimmings, I folded a length in half, sewing the edges of 2 layers together to form a little hat. I tied the top with thread and added a bell. It was so tiny it was a little hard to manage, but adorable! The present is a little epoxy sticker with 2 foam dots on the back so it sticks out from the mouse tummy. I toned down the white of the mouse with a little watered down pumice stone distress ink. It's hard to tell in the photo, but the mouse looks more vintage since the mouse took his pumice stone "bath".


Candy Cane Woodlands are Yummy!
I wanted to try a different colored tree and it looks yummy like a candy cane! I put the tree on a wooden wheel and wrapped the tree base with twine to match the others!

So this project will make a fun addition to a Christmas Village. I wanted to keep the pieces separate so I can use them in different scenes, or all together. I had so much fun making these, I think I will make some more!!!

I've already started on another mouse in progress!

Merry Christmas!!!


Related Posts Plugin for WordPress, Blogger...