I have been cleaning out some fabric cupboards and noticed I had some small pieces of Harry Potter fabric I had collected over the years. I meant to make a scrap quilt out of the scraps, except I didn't really know how to make quilts very well at the time.
I decided to make a Harry Potter quilt to be gifted to a Harry Potter fan I know. I gathered up all my fabric and cut out 10 1/2 in squares. For the smaller scraps I sewed peices together to make 10 1/2 squares of smaller pieces. I didn't plan or organize anything as I wanted it to look like it came together by "magic". ha-ha.
It's a collage quilt for sure, kind of gobby, but I think it will be cherished by the recipient. I sent it off to be machine quilted. It probably won't be back for several months.
I had fun making this quilt and enjoyed the process of finding the fabric and fitting all the little pieces together.
The final size is about 66" X 76". Can't wait to see it all finished.
I bought this adorable highland coo quilt pattern from Art East Quilting. I think I bought my pattern from a seller on etsy.
I ordered all the same fabrics and cut out all the pieces. I soon found out I needed great organization to keep all the pieces in order, so I used my long marking pins I made from long pins and glued on letters. I used up all my pins, and I have 10 of each letter A-Z.
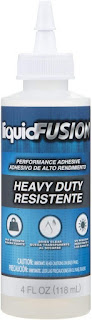
I made my own quilt marking pins using flower pins, and alphabet beads. I glued the beads on using glossy accents from Ranger.
I only made one highland cow block with the optional star design. I decided to put borders on to make the quilt into a larger lap-sized quilt. I am sending it to Missouri Star quilt to be quilted with a shamrock design, and tan minky cuddle fabric backing. It will be so cozy and soft. Here is the quilt top ready to be sent off to be machine quilted.
This lovely quilt is going to my son as a gift. One day about a month ago, he mentioned that he almost bought some artwork of a highland cow, but put it back and didn't buy it. I laughed and showed him the beginnings of my highland cow quilt block. We were on the same wavelength that day for sure. We both laughed. It was a pretty strange coincidence, to both have Highland cows on the mind the same day.
I told him I could make the quilt for him, as I wasn't aware he liked highland cows. So I finished the quilt top and instead of a wall hanging, made it into a full-sized quilt.
I will post the finished quilt in a few months when it comes back from being machine quilted.
Just a note on making this quilt. I realized I cut a few pieces wrong as I was making the block, and I had to go back and recut some shapes, so half the battle is organizing the cuts as it becomes very confusing in a hurry. Make sure before you sew each piece that is measures the correct size before sewing it. Label everything. The pattern is easy to follow, and is adorable, but don't cut it out at midnight like I do when I'm tired, and make sure to label each piece as instructed in the pattern. The pattern tells you which colors they used and kona cotton, and I did the same as I loved their color choices.
Fleur Meadow C9873 Dark Blue - Riley Blake Designs - Floral Flower Leaves White Flowers - Quilting Cotton Fabric
Meadow Trinkets AGF PREMIUM COTTON Rust Fall Floral Art Gallery Fabrics 100% Premium Cotton Quilting Fabric Mask Fabric Rusty Brown Blue
Blue Meadow 0785-0121 Blue Laura Berringer Fabrics for Marcus Fabrics
For the borders, I found some fabric on etsy that matched as I couldn't find any fabric in the stores with the right colors. Local fabric stores are getting harder to find right now, so I often have to order fabrics that will match or to find the fabric collection I'm looking for.
I love this pattern, and will eventually make another similar quilt for me.
I selected this quilting pattern (shamrocks)
Some day I will travel to Scotland again and enjoy seeing the highland cows in person. On a trip to Scotland once, I was on a train and saw some highland cows living a great life near the sea. Their fur was blowing in the breeze and they looked very content. What a life! Highland cows on a green pasture hill overlooking the sea!
I put down a line of glue and picked up the beads with either a wax tool, or tweezers that came with some of the gems. I did a small section at a time. I first did the aqua stripes and let them dry for 24 hours. Then I did the large blue pearl mix sections. That was the fun part. Next I did the clear crystal side section. Let it dry for 24 hours. Last I did the chunky pearl heel. I mixed the pearls with a plastic clear gem that made it sparkle! The heel was hardest because of the curve. I did the heel in smaller sections, letting it dry between. After the shoe was done on one side, I did the same thing on the other side, letting each section dry for 24 hours. When the entire shoe was finished, I added some charms to the shoelaces with large white jump rings.
The shoes turned out so cute and the gems are so much more sparkling than the photos show.
I ended up having to buy one extra pack of the white pearl mix, and another pack of the blue pearl mix as well as I was running out.
This is not inexpensive, but it is very fun and the shoes turn out spectacular! If you want to walk around in Mermaid Sneakers, you have to make some sacrifices! ha-ha.
I probably spent around $70 on glue and gems. I wanted to try many different kinds of gems, so this shoe is a "sampler" of many gems mixed together in sections. I could have used one kind, but I wanted to try lots. I have some extras to bling a few other shoes!