Sunday, August 23, 2015

Belated Final Compendium of Curiosity III Tribute Project

What a fun and life changing experience it has been to have participated in the Compendium of Curiosity iii Challenges this past year and a half! Thanks to Linda Ledbetter and the Curiosity Crew for the Adventure!

In the middle of my final project, I was rear-ended in my car at a stop light and became a little injured so I was unable to complete my final challenge project on time, but now that I'm feeling much better, I wanted to post my finished project!

"It came from within her"


No this isn't the title to a 1960's bad horror movie, but is a tribute to what I have learned from the Curiosity Crew , all the participants, and the wonderful techniques and challenges from the Tim Holtz book "Compendium of Curiosity iii". Hope there will someday be another book!
Throughout these somewhat challenging challenges I have been inspired to push beyond, through the blank stare into my pile of craft supplies, to find the curious and artistic inventions within me. I have learned that it is best to do what I love, and just create whatever I feel like and then the project speaks!

Through the challenges I have learned that when you speak from within, the projects connect with others.

I have learned from your examples of perseverance through the many artistic challenges, your failures that turned out to be victories, and the sometimes accidental greatness! I have marveled at your genius and creativity, and sometimes over-the-top impossible projects gone crazy! You are my people! 


My project is a reminder that we are all powered by something within, and from there springs forth who we are. Let it shine! Whether it sparks you to bake, run a marathon, be a friend, tend a puppy, take photos, grow a garden, take a nap outside...whatever it is...let it be...and let it be you!

Thanks to Tim Holtz and team for their techniques and products! 

Thanks to the Compendium of Curiosity sponsors! 


From the side view you can actually see the technique from Challenge #34 which was the final challenge, Layering Stencil: monoprint from page 48 of the Tim Holtz book Compendium of Curiosity iii.


Here's how the project started. A box from JoAnns. It came as a set of nesting boxes. I had a set of battery led lights on a thin wire I got last Halloween or Christmas. The switch lets you choose continuous light mode, flashing light, or pulsating which happened to be great for a beating heart!

The paper mache heart was from Hobby Lobby. I had always admired the silver steampunk heart in the box project from Tim Holtz and wanted to make my own version.
 I cut a hole in the heart, be careful!
 Painted the heart black.
From there I used whatever I had. Some wooden bits from Hobby Lobby. A plastic jar that looked like a lightbulb from Hobby Lobby. The heart has gear dies cut from foam, glued on, painted, and antiqued. I used Ranger distress paint, distress inks, alcohol inks and Decoart media products for the entire project.
The plastic letters were from hobby lobby. The domino has alcohol ink. The "within" are "thickers" glitter letters colored with alcohol ink. The "from" are tiny American Craft wooden letters.
Since the battery pack is glued on the back, the project was back-heavy and wanted to tip backwards easily, so I glued a black rock to the bottom front to balance the project and make it stable and sit solid.

Besides the heart, my other favorite technique is the "lightbulb".

I printed the moon man on ink-jet acetate. I cut it out but leaving it a thick handle piece of acetate the width of the bulb base. It will look like a sucker with a thick long acetate stick. That way I could use that "handle" to manipulate the acetate inside the light bulb and it keeps it in place as well. To get the acetate inside the jar, just curl it a little and fit it up inside, then the acetate springs back into shape and you can use your acetate "handle" to move it around to face the direction you want. It's very cool looking in person and a little creepy as moon man's eyes follow you around from any direction. 

I made the moon man's collar from cardboard and foam dots punched with a small paper punch, glued on, painted, and antiqued.

There is a tiny fawn resting on some bright green moss. The deer symbolizes the birth of my beautiful children and their children. The inside of the box has metallic cardstock on the back, and stenciled burlap glued on the the inside sides.

I used alcohol ink on the domino and the glittered letters. The from is painted with peeled paint distress paint.

To those of you artistic people who may be going through some hard times, I promise you that if you remember that you have something within that will help you make it through, you will be victorious in that challenge. It is better to focus on a creative outlet than to let the hardship take over. Use that hardship to express yourself through your creativity. Make that statement through your projects that you have it within you to persevere. 

I am happy to say that the "Compendium of Curiosity iii" challenge helped me to rise above and find the inner me artistically...and that has brought me peace. Most of the time I create projects that help me...but this time the project is for all of you!

My moon man lightbulb shines down on you all and says "Thanks!"

XoXoXo!

"It came from within her" movie.

Sometimes you have to wear a Hat - My take on the August Tim Holtz Tags of 2015


I'm playing along with the Tim Holtz 12 Tags of 2015. I loved using the cut-outs and the decopauging onto the background! I never would have thought of that!

So here is my take on the tag. Let me explain my "inspirational" sentiment.

"Sometimes the journey craps on your head, and you have to wear a hat."

Have you ever had a time period where you have to persevere in spite of everything going on around you? A few weeks ago I was waiting at a stoplight on my way to work, when out of nowhere I was rear-ended by a large Yukon XL. I drive a Hyundai. Nothing too serious, but I had whiplash, a bruised up back, and a $2000 car repair. So I wasn't feeling very well for a few weeks, but I had to keep going to work. Then while my car was being repaired, I had to get a rental car. I don't enjoy driving a car I'm not used to. My car repair was supposed to take 2 days, but it took 1 1/2 weeks. So every morning when I went out to the rental car to go to work, I found the birds had left many surprises for me on the rental car windows. So I had to go back inside and get some spray cleaner and paper towels, with my whiplash, and clean off the windows of the rental car, then head off to work, totally paranoid that every car was going to rear end me. So this is where my sentiment came from, and it was very inspirational at the time, because every day, there was a new bird splat on the rental car. 

So in spite of the challenges, sometimes...like the tag says, you just have to put on a hat and keep on going.
The photo doesn't show the expression on the owl's face, but that was pretty much my expression throughout the whiplash, car repair, bruised up period of time. No fun!

But...I did have fun making this tag, and it helped me to forget about my pains for a while, in spite of the tag's message, it is actually a good message. Do-Do Happens, so put on the hat. Do what you have to do. Keep on creating and tell your story!

So I cut out a bunch of gears from the top tag. I used a rusty background underneath.
Then I put a bunch of gesso on the top, like in the tutorial. See the Tim Holtz thin-lit number die cut out on the left side.
 I died the bow, and used a crackle stamp and various die cutouts on the top layer of the tag.
 I used some ephemera, some I printed on the computer, and some are from the Tim Holtz collage elements.
Of course I created my own "sentiment" as this isn't a sentiment anyone would probably want to embrace, except me.
 But the "sentiment" inspired me to persevere throughout my rough few weeks!
I'm starting to feel a lot better, and since I got my car back, I haven't had one bird splat experience. It's like the birds didn't like the rental car or something. The rental car was red, maybe a better target.The rental car was also way nicer than my car.

My car is dark blue, and the birds, probably like me, prefer what they are used to having in the driveway. Maybe the birds were on my side and were expressing their displeasure at the whole experience. Thank you birds for the solidarity!

So thanks for checking out my goofy tag this month. I enjoyed playing along and trying out the techniques!

Friday, July 24, 2015

My Patriotic take on the July Tim Holtz 12 Tags of 2015

I'm playing along with the Tim Holtz 12 Tags of 2015. The July tag used watercolor techniques and his new distress micro-glaze from ranger. I had some of the old Judikins micro-glaze already so I used that. Never would have thought to use it the way Tim Holtz did in his tutorial...as a watercolor resist! Great idea!
http://timholtz.com/12-tags-of-2015-july/
So here's my tag using all of the techniques in the July 12 Tags of 2015 tutorial.

I rounded up any patriotic stamps I could find in my collection. For the background I used paper from the Tim Holtz Seasonal Stash. I made a charm using the Tim Holtz fragments and I adhered an image to the back with glossy accents. For the ribbon, I stamped on the ribbon with black archival ink, then followed the tutorial to color the ribbon with red, white, and blue! Cool technique on the ribbon!


Love the distress spritzer! I added lots of distress speckles!


Feeling very patriotic after completing my July tag! Thanks to all who serve our country and for the freedoms that we have!

Someday I hope to get the patriotic Tim Holtz mini-blueprints. I have many of the other seasonal blueprints. I have the happy birthday blueprints. I used to get them with the card kits at Archivers but now Archivers is gone...so sad! Well, I guess I better stick to my budget, so I just used whatever I had for the July tag.

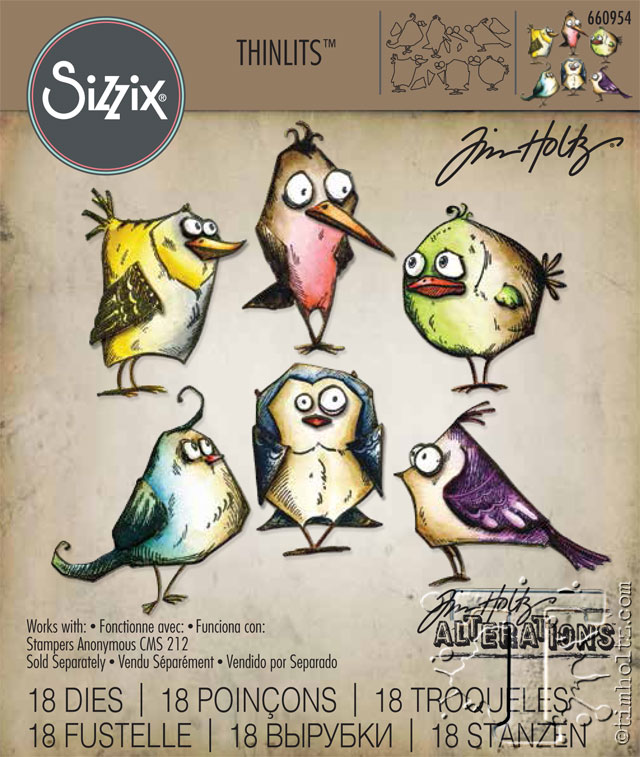
I already used up my Tim Holtz budget allotment ordering the new bird crazy dies! Oh boy!
http://timholtz.com/sneak-peek-bird-crazy-with-sizzix/
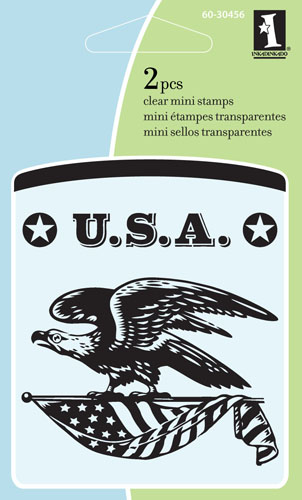
The stamp I used on the ribbon is an old Inkadinkado stamp called mini patriotic eagle. There are 2 stamps on the sheet. It was $1.99! I don't think it's available any more though.

Tuesday, July 21, 2015

You can't stop me from "Stencil Girling" my new bathroom wall!

Ok, this time I've gone too far...well, you can decide.

What happens when you combine a love for mixed media art supplies with finishing a new basement bathroom?

Let me explain.

I've had an unfinished bathroom for 20 years and it was time to finally get that bathroom finished! A neighbor contractor agreed to help but he was very busy and couldn't work on it consistently. Getting impatient we decided to go right ahead and put up the wallboard, and texture the walls ourselves. While the seams were being taped and plastered, I noticed that the wall plaster looked a lot like texture paste and I have lots of stencils from "Stencil Girl"...so I was thinking...what would happen if I stenciled some wallboard...just for fun...while I'm waiting for the wall seams to dry?

So I did a test on a spare piece of wallboard. It looked pretty good. I used regular wall plaster, the stencil, and a little palette knife. Lookin' pretty cool.

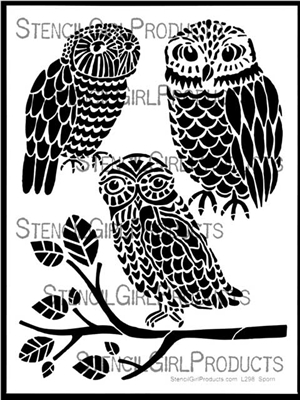
 What about the owls? Worked pretty well too on the wallboard. Hmmmm.

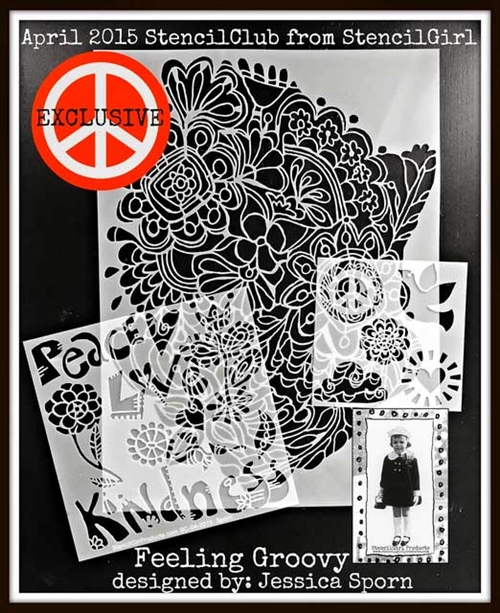
So I was wondering...what if I stenciled the entire wall so that it looked just like spackled texture from afar...but when you looked up close you could see the stencil designs. So I decided to make one entire wall a mass of stencil texture using my two favorite stencils from the Stencil Girl. I used the large Feeling Groovy stencil from the April 2015 Stencil Club, and all three of the owls from the Three Owls and a Branch stencil.


So I went for it and placed the stencil randomly all over the wall, applying plaster. I didn't even use tape, I just let the plaster hold up the stencil. Tape is for wimps. When the stencil became goopy after about 15 applications, I washed it off. So after the plaster dried, I went back and filled in the gaps with owls. After that all dried, I went back with random sections of the feeling groovy or the owl stencil. After it all dried, it was uneven as some of the stencils were applied over the top of other stencil applications. So I got the flat wall sander, which is made to knock down uneven wall texture and gently sanded it all down just a little so it would be even.


It worked! The whole wall took me three nights to texture, but I only worked on it for about 45 minutes each time.

Here is a section on the actual wall.
I like how the owls are just hanging out in the middle on the design, randomly. The whole thing is random glory!
The entire wall before I sanded it evenly.

Here is the wall with primer painted on over the plaster. You have to paint over the plaster as the plaster is not permanent by itself.

Here is the wall with 2 coats of paint. It's hard to see the texture with the white glare, but it looks pretty cool. I'm glad I was brave enough to just do it!

I'm telling you. It's beautiful in person. Our contractor neighbor came over and said "Holy What?" Then he kept looking at it and he couldn't figure out how I had achieved this. He was asking all kinds of questions about the stencils and couldn't figure out how I had achieved this with a small palette knife and some stencils. I think he's thinking up new projects with custom wall treatments. Hey, this wall is not for sale, my bathroom is art!


So I'm just saying that my funky bathroom dream-wall is now a reality and I will be able to admire it from the comfort of my crazy new bathroom when it's finished! If you've got some time, this is a very inexpensive wall treatment. So if you try it my only stipulation is that there should be no planning, measuring, or taping allowed! It should be random and fun! 

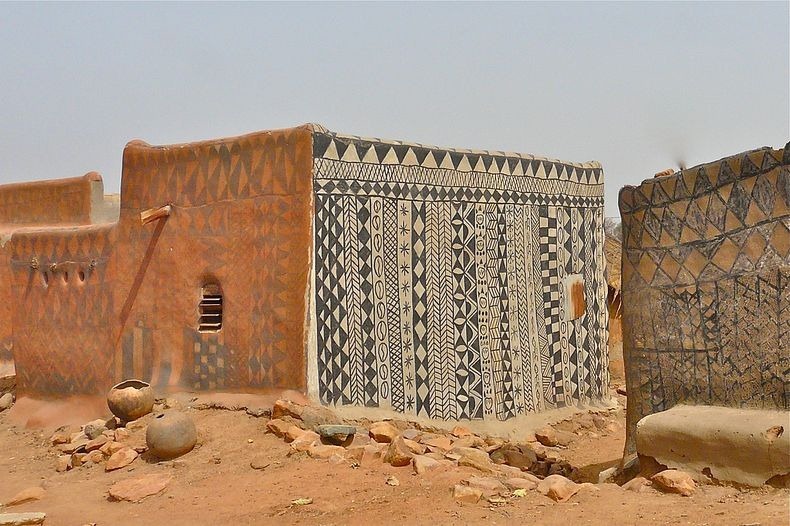
After this project, I'm just saying, don't let me near any sharpies because I've had my eye on a house project I saw online and I have this large ugly tan area on my house....I think the people of Burkina-Faso in West Africa invented the zen-tangle-house! Better hide those sharpies from me!


Monday, June 22, 2015

My strawberry June Tag - Tim Holtz 12 Tags of 2015

I'm playing along with the Tim Holtz 12 Tags of 2015. The June 12 Tags tutorial made me thirsty!  
Love the plaid and the yummy looking drink that is perfect for holding a gift card!
Here's my strawberry take on the June tag.
I love the strawberry frappuccino, with the whipped cream, of course! I made my own strawberry frappuccino out of various distress inks on the cup that I cut from a manila folder. I was excited to try out my new Tim Holtz die that I found on sale at the local JoAnns! Yipee!


For my frosty drink lid I used a stencil and some texture paste on the back of the lid cutout I cut from plastic packaging. Then I put glitter sparkle goop on the back after the texture paste was dry. This swirl stencil is an ancient stencil from the 1980s. It still works great, you just have to wash the stencil after each use.


For the round circle I used 2 colors of distress paint. I stamped the strawberry onto some cardstock, colored it with markers, and added glossy accents for the luscious strawberry.


I printed my #berrycool hashtag on the computer. I inked up a piece of white burlap to match.


Now I'm so thirsty! Can't wait to go get a strawberry frappuccino at the local starbucks!

Thanks for checking out my yummy tag!


Tuesday, June 9, 2015

Faux cracked glass, Challenge #30, Compendium of Curiosities 3

It's been a few months!!! Where have I been! I missed my creative friends! 
So I am once again participating, and this time it's Challenge 30 of the Compendium of Curiosities iii Challenge on the Studio L3 blog by Linda Ledbetter. Challenge 30 was so tempting because we are using the faux cracked glass technique as found on page 54 of Compendium of Curiosities 3 by Tim Holtz. 
Challenge 30 is sponsored by The Funkie Junkie Boutique who will provide a $25 shopping spree for the winner of the challenge, with more prizes courtesy of Tim Holtz and Mario Rossi for the fabulous Curiosity Crew's choice winner!

My cracked project is an old and mysterious jar of Wisdom. See how cool the cracked glass technique is. Makes the jar look straight out of Harry Potter or something! The faux cracked glass technique is so cool and it is so easy to get a nice effect!
I actually used an antique jar I got at a flea market a few years ago. I love the squatty shape of the jar. My daughter brought back the gargoyles for me from her Theater Study Abroad program to London long ago...to thank me for sending more money after she used all of her food money to buy theater tickets, which she promptly spent on more theater tickets. She lived off of biscuits for 2 months. She is a drama teacher today, which gives me many opportunities to make theater props...usually at midnight...in a panic...to help her...even though a long time ago she spent her food money on theater tickets...I still help her...because the show must go on!
Potpourri Stopper Tip
Here's an excellent tip for you. You know the bags of potpourri that have big pods and other seeds included? Well, my stopper is just an item that was in a bag of potpourri that just happened to fit the jar perfectly. I use potpourri elements for stoppers on bottles all of the time! At the end of the post I will include some photos of jars where I've created similar stoppers.
For my jar label, I found a label on the internet and photo-shopped my own words on the label. It says vics creations, Druggist. No. 2015  Dr. h.n. life. WISDOM. I put the label on the jar during the first step of the faux cracked glass technique. Go read about it in your copy of the Compendium of Curiosities 3 book!
So the past few months have been challenging and I haven't had much time to participate in the CC3 challenges which made me sad as I have loved participating this past year. So while I was thinking about this project I realized that even though things don't always go the way you expect or when you experience difficult or challenging events at work, home, whatever, that's when you gain that elusive Wisdom. Gaining Wisdom isn't always fun, and so I place my gargoyles to protect my Wisdom and to ward off any more events that may lead to Wisdom for awhile!
Back-off Wisdom, my jar is already full! If you look closely you can see my little pearls of wisdom peaking through the cracked glass on the back of my project.
Here is a close up of the stopper. On top of the potpourri seed pod wrapped around the hay-rope dealy, I slid an owl bead onto a very long pin. I topped the pin with the faux cracked glass technique as well.
I love how the cracks turn out differently on all the sides.  I thought it needed a little bling on the side.
The rope and the pod just happened to come out of the potpourri bag that way! Accidental creativity is the best! Gargoyle is so pleased!
Here is the original label I created for the jar.
I'm happy I was able to participate this time. It's been a fun experience participating in these challenges, the CC3C challenges, not the life challenges! Don't make me get some bigger Gargoyles!
Here are some jar stopper ideas! Mr. Skellington on the left was a large pod that was in a bag of white Christmas potpourri. I stuck a pin in the pod, and cut the head off the pin and stuck it into the cork with some added glue. I drew the face on with a pencil, then went over that with a black fine-tipped marker like a sakura marker or micron pen. 
The seed pod on the right was just the right size to fit into the spooky jar. 
Next time you are at a store where they sell bags of Potpourri, especially after Christmas, peek inside to see if there are any "cork-worthy" items!
Congratulations to the fabulous curiosity crew on your up-coming crafty cruise to Costa Rica in 2016!!! Talk about the ultimate Creativity Cruise with the experts of Curiosity...the Curiosity Crew! Wish I could go! Someday...
Related Posts Plugin for WordPress, Blogger...