
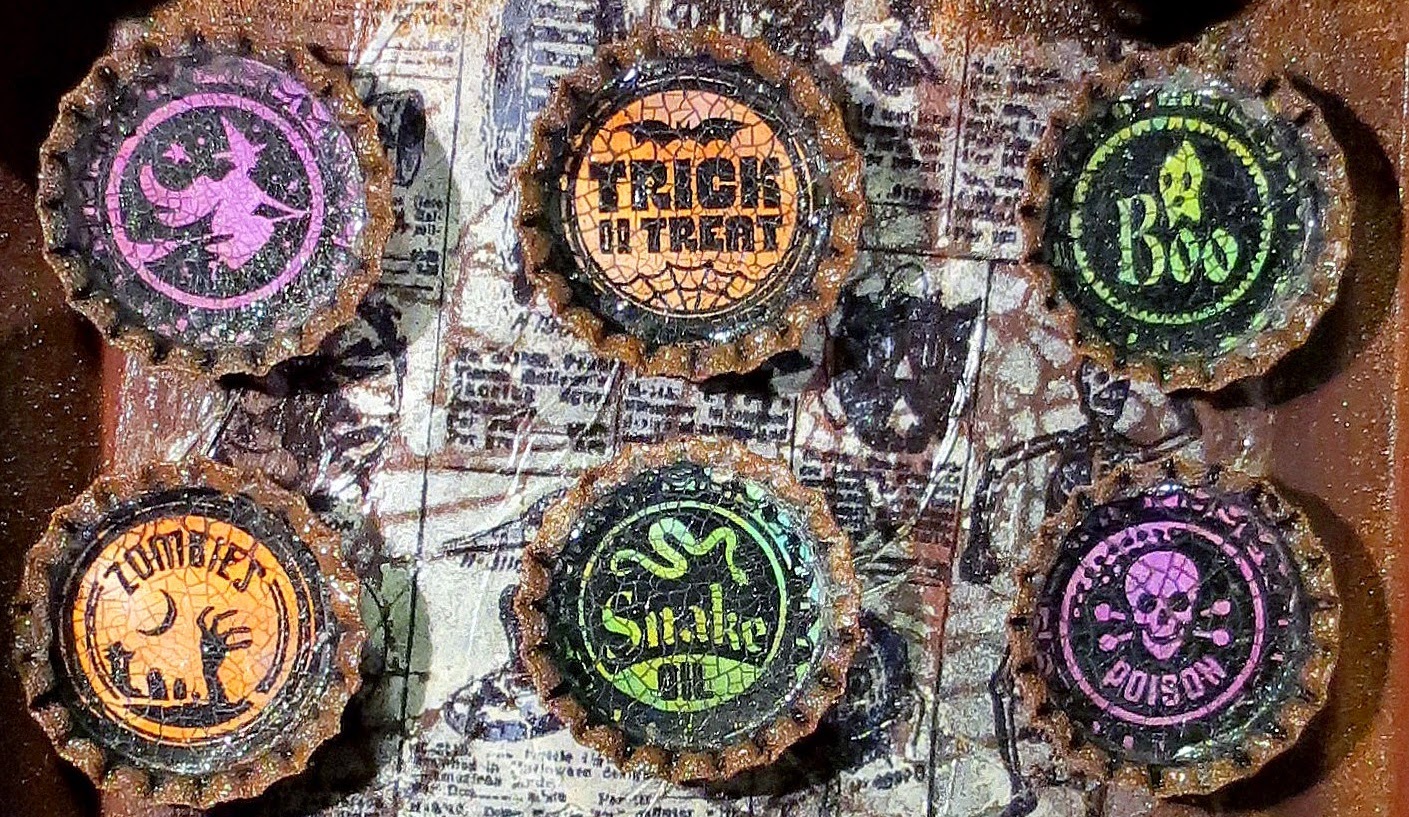
I just purchased some bottle cap stamps from inkadinkado that I wanted to try out. I thought it would be fun to make some rusty Halloween bottle caps.

First I created a bunch of cool Halloween colors with alcohol ink. Then I stamped with archival ink.

Then I prepared some rusty bottle caps. I could only find bottlecaps with letters on them but the letters got covered up by the stamped circles that I cut out and glued into the bottle caps. I sealed the surface of the images with matte medium and let them dry. After they were dry I covered them with rock candy crackle and let that dry. I used black soot distress paint to bring out the cracks.

For the pumpkin I wanted to go old school and cast some plaster in a mold. I used to make and paint lots of plaster crafts as a child. I poured a plaster product into a Wilton black cat and jack-o-lantern cookie mold to make the jack-o-lantern. $2.00 for the mold!

I enjoyed using the alcohol ink on my steampunk clock project so I again used several colors of alcohol ink on the pumpkin. I used a 2-step crackle product on the pumpkin and after it was dry I rubbed black soot distress paint into the cracks and wiped it off. Love the crackle! I'm starting to enjoy the alcohol inks a little more and like the bright vivid colors!
Spooky Polymer Clay Candle
The owl is a purchased figurine and the red skull is a large carved bead. I made the candle on the skull with polymer clay. There are lots of tutorials on youtube showing how to make miniature candles out of polymer clay.
The box base for my project was left-over from some packaging. I painted it all colors of rust and used some rust effects powder on it too.
Tim Holtz Halloween Catalog Background
I recently purchase the Tim Holtz halloween catalog background stamp and was excited to give it a try! It was on sale at Joann.com for $9.54! Check it out as it's still on sale! What a cool stamp!

I stamped on some tissue paper with archival ink. Then on the other side of the tissue paper I used the shattered stencil with linen distress paint. I used matte medium to stick the tissue paper onto my project. When it was dry the distress shattered web showed through the stamped image. Pretty cool!

Putting it all Together
I made some fabric flowers with the tattered floral die, and a matching bow. I cut out some felt bats using the Tim holtz large witch die. I put it all together using foam tape to make the bottle caps and pumpkin dimensional. I added some embellishments and hung it up on my piano to take a photo!
I love the rust effect on the bottle caps and box that instantly age the project! I also love my new scary Tim Holtz Halloween Catalog background stamp!
It was fun to make this old school project featuring common stuff like plaster, tissue paper, bottle caps, fabric, felt, and an old box, and dress it up with various effects to make it look old and scary!
Thanks for checking out my project and for inspiring me to create! Your wonderful projects make me happy! Xo-xo!
Fabulous piece, I adore your pumpkin and what a bargain the mould was! The crackle looks fantastic and the alcohol inks work fabulously in your design. Love the owl and skull bead too. Great piece of art. Tracy x
ReplyDeleteVery cool, Vic. Love the crackle, love the rust, and really love all the embellishments you created for this assemblage. Your details all came together perfectly. Nice!
ReplyDeleteHoly cow...this is amazing..all the details and the rust and the crackle! Fabulousness!!! Thanks for sharing this with us at CC3Challenge!
ReplyDeleteVic...this is BEYOND cool! I love LOVE your crackled and rusty looking pieces. They are too cool! And your pumpkin head...LOVE it, too! This screams "VINTAGE!" and I love it! Thanks for sharing the step by step. This will make such a wonderful Halloween decoration! Thanks for sharing your art with us at CC3C. <3 Candy
ReplyDeleteThis is so awesome - love everything about it!
ReplyDeleteAWESOME creartion Vic... LOVE everything about it... the whole thing makes me want to reach out and touch it, it looks so tactile... Thanks for playing along with the CC3 Challenge and hope to see you again soon x
ReplyDeleteOh my goodness, Vic, this is AMAZING. I love all things Halloween and every single little detail here has me giddy! Those crackle bottle caps are perfect, and I never knew you could use a cookie mold for other stuff besides cookies. Duh! Why not? Thanks for the education. You're inspiring.
ReplyDeleteVic...you outdid yourself here! WOW!!! Amazing Halloween make! Love all the crackle and vintage feel, and there is so much to love!!! Just fantastic every detail! Thank you so very much for joining us in the Effect Powders challenge at CC3Challenge!!!
ReplyDeleteVic, this is really really cool!! The rust effect is perfect and all the details are wonderful. Love the pumpkin and the bottle cap stamps too!!
ReplyDeleteVery spooky, wonderful textures and what fun embellishments! Your rusted bottle caps look amazing.
ReplyDeleteI love your project. It has so many great elements. Nice work!
ReplyDeleteVic, this is awesome! Love your rusted out bottle caps and the cracked pumpkin. Fab!! Thanks for joining us at CC3C!
ReplyDelete