Compendium of Curiosities III Challenge
I am participating in the Compendium of Curiosities III Challenge on the Studio L3 blog by Linda Ledbetter. The Challenge 8 technique features the faded layers technique found on page 58 of Compendium of Curiosities 3 by Tim Holtz. Challenge 8 is sponsored by The Funkie Junkie Boutique, and also by Mario Rossi and Tim Holtz!I tried out the faded layers technique before when I took the Tim Holtz Creative Chemistry 102 course! I was surprised at how easy the technique was this time when I followed the instructions in the book.
For this project I decided to decorate my other Tim Holtz Burlap panel that was left-over from challenge 6. Even though it's only August I've been seeing some Halloween crafting starting to show up on lots of blogs right now which made me excited as I love Halloween crafts! Halloween and Christmas are my favorite crafting inspirations.
Since I'm scared of alcohol ink, I thought I should do something scary, so I created a monster!!! (lightening bolts, and thunder here)
I Created a Monster
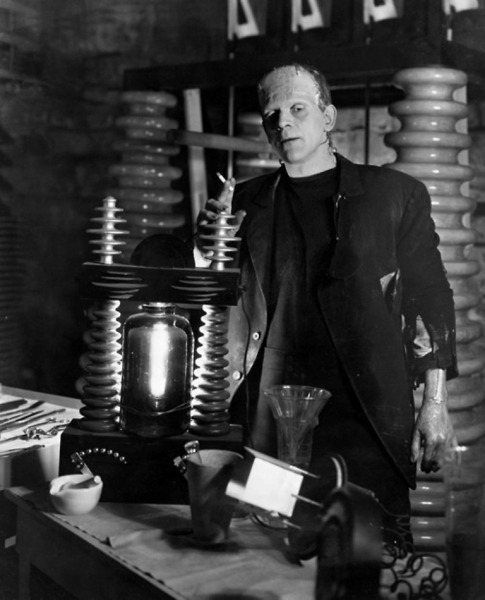
Decoupaged and Transferred Frankenstein Movie Graphics
I found a bunch of Frankenstein movie graphics from the old original films that I printed after work on the laser printer. I decoupaged lots of black and white images onto the canvas, then I let it dry. Then I did the faded layers technique for the background. Then I sealed the background with decoupage medium and let it dry. I only needed to seal it so I could transfer Frankenstein onto the faded layers without ruining it. If I didn't seal it first, my Frankenstein transfer process would ruin the pretty background.To transfer Frankenstein, I put the photocopy (laser print) of Frankenstein face down on the background, then I used a chart-pak blending pen on the back of the photocopy and kept inking it with the chart-pak blending pen until the back of the photo copy was saturated. I let it sit for a minute or so, then I peeled off the photocopy and Frankenstein was transferred. I practiced this a few times on a blank piece of paper until I'd figured out how to make the transfer process work so I wouldn't ruin my background. It takes some practice and sometimes it doesn't work very well. You just have to experiment.
Here's the background before I transferred Frankenstein onto it.
Monster Embellishments
After I transferred the Frankenstein image I had fun sewing on my creation, and creating embellishments for the panel until it came "Alive!"
I made this embellishment by printing an image with a laser printer. Then I cut it to fit my frame, then I decoupaged it to the frame putting the decoupage medium on the top and bottom of the image. After it was dry I put another coat of decoupage medium on the top making sure the edges of the image were all sealed. Then I let that dry. Then I used some uv-curing resin Lisa Pavelka - Magic-Gloss and the Lisa Pavelka UV Curing Light. You could also use glossy accents or dimensional magic.
I drilled holes in the sides of the canvas for the Frankenstein Bolts, my favorite part of the project!
I made the poison bottle using a small brown tinted bottle, a label, a Tim Holtz skeleton embellishment, and some green stickles. I squirted green stickles inside the bottle and also made a mess with it so it could ooze out the top.
I used a Tim Holtz key embellishment that says "Life", as the monster needs the key to life to become ALIVE! I also used a small shrink plastic mummy charm I made. Wasn't there an old Frankenstein movie with a mummy? Anyways the charm was a left-over from some charm bracelets that I was making last year that I haven't finished yet. (One of the millions of projects that are ... almost done...)


Cool piece Vic! Love the background with Frankenstein's image. Also all that lovely stitching. Karen.x
ReplyDeleteWhat a wonderful background you achieved! Fun canvas~!
ReplyDeleteWhat a wonderful spooky piece, Vic! Very creative using the image transfer technique as you did over the background! Love all the details, including the separate small images, the sewing and, of course, the screws on the burlap panel. Awesome!
ReplyDeleteOh, Vic! This is so fun. I love that gorgeous background, especially all the neat layered effects with the colors, and then all the fun embellies in and on the canvas. Thanks for joining in at CC3C!
ReplyDeleteVic...oooohhhh....this is spooky and waaaay cool! I love Halloween and your canvas is awesome! I love your green faded layers background. Perfect for Mr. Frankenstein! I would NEVER had thought of this but I love it! The machine stitching is a great touch as are the retro graphic of the Bride of Frankenstein and good ol' Frankie himself on their wedding day. Love the little vials and other embellishments you've added, too. Very clever! Thanks so much for sharing your wonderful art with us at CC3C. <3 Candy
ReplyDeleteSo spooky and fun! Love how you incorporated the faded layers technique into this fun creation! Love the background. Love all the little bits and baubles you've added as well. Fabulous!!! Thanks so much for sharing with us!
ReplyDeleteHello creepy cool! LOVE the shattered stencil here! There is so much to see and love! Fabulous green too! Thanks so much for joining us on this cool challenge at CC3Challenge!!!
ReplyDelete