Sunday, September 21, 2014

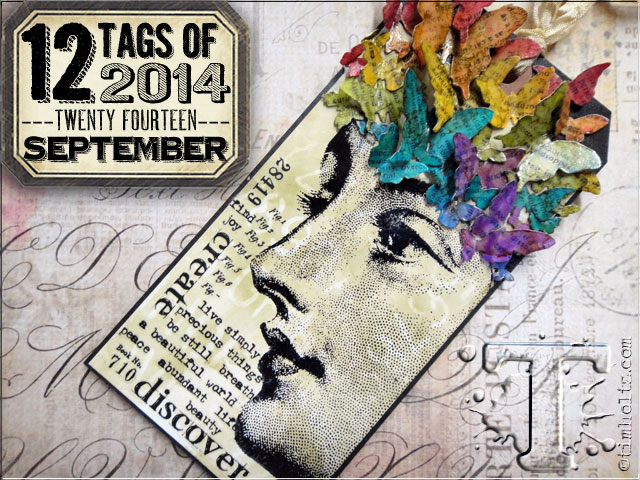
Sept 2014 Tag - Playing along with the Tim Holtz 12 tags of 2014

I've been playing along with the Tim Holtz 12 tags of 2014! This month we are trying out some new techniques with alcohol inks. Check out the Tim Holtz tutorial to learn how!!

Here is my September Tag featuring Mr. Steampunk Owl, and lots of circles from the Tim Holtz Stamp set "Bitty Grunge".


The alcohol ink background technique worked, but turned out a little darker than I wanted, but then I decided I kind of liked it anyway. I love the circle stamp over the bright colors! The technique was pretty fun and easy!!! I really enjoy playing along with the Tim Holtz 12 tags. Everyone that plays along is so creative and I enjoy learning a new technique every month!!! It's also fun to share what we create!

I love Fall, and for some reason the tag reminds me of fall even though there technically isn't anything really "Fall" happening on the tag.

I'll have to say a few months ago I was scared of the alcohol inks. I mean, who can trust something that evaporates so quickly and smells like something you need to put on a wound? Every time I tried to work with the alcohol inks, I subconciosly felt like someone was going to give me an immunization and I became uncomfortable!

I'm still a little scared of the alcohol inks, but thanks to all the great tutorials, I'm learning how to use them and am enjoying the vibrant colors!

Thanks for checking out my tag!!!

Monday, September 15, 2014

CC3C Challenge 11 - Effects Powder Halloween Bottlecap Curio

It's time for another challenge project! I am participating in the Compendium of Curiosities III Challenge on the Studio L3 blog by Linda Ledbetter. For Challenge 11 we are using effects powder techniques found on page 52 of Compendium of Curiosities 3 by Tim Holtz. Challenge 11 is sponsored by Inspiration Emporium, with more prizes courtesy of Mario Rossi and Tim Holtz!

Rusty Bottlecaps
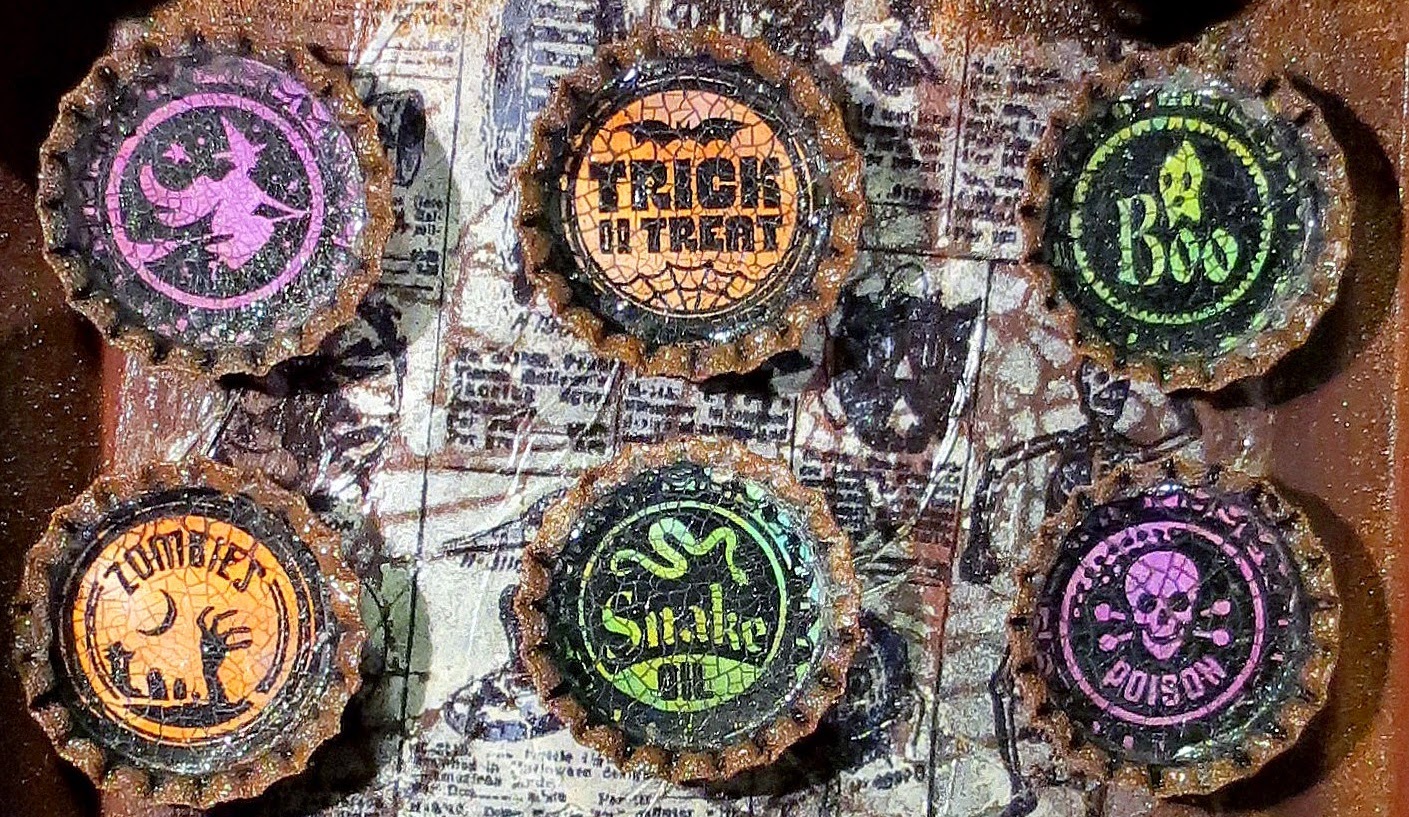
I just purchased some bottle cap stamps from inkadinkado that I wanted to try out. I thought it would be fun to make some rusty Halloween bottle caps.


First I created a bunch of cool Halloween colors with alcohol ink. Then I stamped with archival ink.


Then I prepared some rusty bottle caps. I could only find bottlecaps with letters on them but the letters got covered up by the stamped circles that I cut out and glued into the bottle caps. I sealed the surface of the images with matte medium and let them dry. After they were dry I covered them with rock candy crackle and let that dry. I used black soot distress paint to bring out the cracks.


Crackled Plaster - Old School
For the pumpkin I wanted to go old school and cast some plaster in a mold. I used to make and paint lots of plaster crafts as a child. I poured a plaster product into a Wilton black cat and jack-o-lantern cookie mold to make the jack-o-lantern. $2.00 for the mold!


I enjoyed using the alcohol ink on my steampunk clock project so I again used several colors of alcohol ink on the pumpkin. I used a 2-step crackle product on the pumpkin and after it was dry I rubbed black soot distress paint into the cracks and wiped it off. Love the crackle! I'm starting to enjoy the alcohol inks a little more and like the bright vivid colors!

Spooky Polymer Clay Candle
The owl is a purchased figurine and the red skull is a large carved bead. I made the candle on the skull with polymer clay. There are lots of tutorials on youtube showing how to make miniature candles out of polymer clay.

The box base for my project was left-over from some packaging. I painted it all colors of rust and used some rust effects powder on it too. 

Tim Holtz Halloween Catalog Background
I recently purchase the Tim Holtz halloween catalog background stamp and was excited to give it a try! It was on sale at Joann.com for $9.54! Check it out as it's still on sale! What a cool stamp!
I stamped on some tissue paper with archival ink. Then on the other side of the tissue paper I used the shattered stencil with linen distress paint. I used matte medium to stick the tissue paper onto my project. When it was dry the distress shattered web showed through the stamped image. Pretty cool! 


Putting it all Together
I made some fabric flowers with the tattered floral die, and a matching bow. I cut out some felt bats using the Tim holtz large witch die. I put it all together using foam tape to make the bottle caps and pumpkin dimensional. I added some embellishments and hung it up on my piano to take a photo!

I love the rust effect on the bottle caps and box that instantly age the project! I also love my new scary Tim Holtz Halloween Catalog background stamp! 

It was fun to make this old school project featuring common stuff like plaster, tissue paper, bottle caps, fabric, felt, and an old box, and dress it up with various effects to make it look old and scary! 

Thanks for checking out my project and for inspiring me to create! Your wonderful projects make me happy!  Xo-xo!

Monday, September 8, 2014

CC3C - Challenge 10 - Steampunk Cat Assemblage Clock

Compendium of Curiosities III Challenge 10

I have been participating in the Compendium of Curiosities III Challenge on the Studio L3 blog by Linda Ledbetter and the fabulous Curiosity Crew!!! Their work is always spectacular and they have inspired me so much during the challenges! For Challenge 10 we are using the Tim Holtz Assemblage Clock technique found on page 33 of Compendium of Curiosities 3 by Tim Holtz. Challenge 10 is sponsored by The Funkie Junkie Boutique, with additional prizes donated by Mario Rossi and Tim Holtz!

Mr. Steampunk Cat
I've had a blank assemblage clock for a few months but didn't dare to do anything with it. I had Assemblage Clock Block! The Curiosity Crew inspired me to give it a try. I love Mr. Steampunk Cat by Stampendous!!!


Alcohol Ink
I'm not so great at using alcohol inks, but I wanted to attempt covering the entire clock with various colors of alcohol ink using a technique I learned in the Tim Holtz Creative Chemistry 102 course! The technique allows you to cover metal a little more opaquely. After the alcohol ink was applied, I wasn't happy as I could still see the silver underneath, so I coated the entire alcohol ink covered clock with matte medium and let it dry. Then I applied another layer of alcohol ink over that just the same as the first layer and that did the trick. No more silver.

Crackle
I also wanted lots of crackle. I am very picky about the crackle process. I have been crackling, (not cackling), since 1973 so I have lived through the many phases of crackle products. There are so many choices, but for this project I went with my favorite crackle which is the old two-step crackle (which has been discontinued - boo-hoo) as I know how to control this crackle. I have tamed the wild crackle! I put on two coats of step 1, letting the coats dry between. Then when that's all dry, I apply step 2. I like to apply step 2 thinner in some spots and thicker in others as it makes for an interesting surface. So this was a truly vintage finish as the crackle products are vintage, are a little thick and cloudy, and not even made any more!

So I love the crackle. After the crackle is very dry and you can see the cracks, I coated the clock in black soot distress paint, then wiped it off. I did this in sections. I like the distress paint for this because it goes on thin like ink, gets into the cracks, it doesn't dry as fast and it's easy to wipe off with a damp paper towel.


The inside stuff
I made some polymer clay gears with various colors of metallic clay to use inside. I water-colored on Mr. Cat, coated him with matte medium so he wouldn't tear when I cut him out, and glued him to card stock. I used 3 bingo pieces stacked on each other to make the Cat pop forward.

Rusty toys
I used a rusted plastic airplane I created during another experiment with Modern Masters iron paint and rust solution.

There are many ways to make things look rusty I am finding, but for the plane I used Modern Masters iron paint and rust solution. It takes some experimenting but I enjoyed playing with it! Here's a tutorial from Modern Masters in how to rust a wall. All I did was paint a few coats of the iron paint onto the plastic toys until they were covered. After the paint was totally dry, I dipped a small sponge bush into the solution and saturated the paint. It takes a few hours for the rust to show up. If it's not rusty enough, you can use some more rust solution. It takes some practice. It was fun though and I have a whole collection of rusty stuff. This is real rust, not "faux rust" as the paint has iron particles in it.

I put some black feathers in the bottom of the clock to make Mr. Cat happy, and glued the gears around. I glued the airplane flying outward with a glue gun.

Jewelry Embellishments
I carefully put the clock all back together (darn feathers wouldn't cooperate) and added some jewelry embellishments! I thought Mr. Kitty might enjoy batting at some dangling embellishments!


The Assemblage Clock is not scary
This was a fun project and I have to admit the Assemblage Clock was not as hard as it looked and it was pretty fun to create my little Steampunk Feline scene. If I had more time I would attempt to create some tiny steampunk rats, but this is it for now!


Related Posts Plugin for WordPress, Blogger...