Tuesday, March 4, 2014

March 2014 Tag - Playing along with the Tim Holtz tags of 2014 - March

Here's my March tag based on the Tim Holtz tutorial for March that is part of his 12 tags of 2014.

I really struggled with this tag. I smudged all the stamps. I spattered, and I stenciled. It wasn't working all that well. I didn't have an egg stamp so I inked through an oval stencil shape, then I used a Tim Holtz spatter stamp through the oval stencil to make the speckles. My bird smudge is so smudged, you can hardly see it. I found a nest stamp I didn't even know I had. I spattered through a bird wing stencil but you can't see it very well as the tag is so light. As one point I didn't like the tag, so I sanded all the stuff off almost completely.

So I just kept trying until I gave up and went to do some yard work as it's been unusually warm outside. It was while I was doing some yard work, that some birds were being especially noisy. Then a large family of quail were loudly chirping in several back yards in my neighborhood. They were extremely busy as they always are at this time of year. As I was surrounded by many different bird species that were all very excited by the warm weather and the recent rains that bring worms, it struck me that each year they come to my yard to my trees and they rebuild their nests. It doesn't matter what happened the year before, or how nice their nest was last year, they must always rebuild. So the birdies gave me the inspiration I needed to finish.

It was a good lesson for me.


 So I decided to leave my smudgie tag a lone and let it be a creative process.

Thanks for stopping by and letting me share.

Thanks birdies for teaching me a lesson I needed.

Saturday, January 18, 2014

It's Thanksgiving in January - I finally made the Querky Turkeys, using the Tim Holtz Rosette die and tutorial!


Last year I saw these "querky turkey's" on the web and I was jealous because I had no querky turkeys for my thanksgiving celebrations and the tutorial was so 2011 and all the cool people made theirs already.

But this year, I tackled the "querky turkey" and made these 4. Still not in time for Thanksgiving this year, but by Thanksgiving 2014, mine will finally be complete and will be just as festive as those everyone else created in 2011!!! (Ok, mine are still missing the adorable "tickets" in the tutorial...but eventually mine will be finished!)

Here's the great tutorial by Tim Holtz that shows how to make them!

Remember to put a strip of tissue tape on the back of the paper after it has been cut out, but before folding so it doesn't tear at the perforations as you fold it up. Instead of tissue tape, I used a strip of newspaper the same width as tissue tape glued on with a glue stick. It's on the back so you don't see it, but if you do, newspaper still looks cute.

It's never too late to celebrate the noble turkey, which almost became our national bird!

And join with me in my tradition of celebrating any holiday you want at any time by making holiday decorations. It's January and I still have a large Halloween skull pottery in my yard with purple faux feathers coming out of the head. Yep, still got my Christmas Trees up. I also made a few Thankgiving turkeys! It's all good. Let's not worry about the small boring stuff when there's glitter to be applied!

Make a gaggle of gobblers in january, that's what I always say.

Snowflake Ornaments - Made from Tim Holtz Snowflake Rosette die


I made 4 snowflake ornaments using the Tim Holtz Snowflake Rosette die! It's an amazing die! 

I used some scrapbook paper with an ice pattern. I added blue denim distress ink to the edges, mica glitter randomly, and I also added embellishments to the centers. I used tissue tape on the back before folding so the perforations don't tear when you fold it up. If you don't have tissue tape, you can cut a strip of newspaper the same width as tissue tape and glue it on the back with a glue stick. I've done that and it works too.

To learn how to make the paper snowflakes using the Snowflake die, you can follow this video tutorial by Tim Holtz for making paper rosettes as the technique is the same. It's an excellent tutorial!


Look what "It's raining jelly beans" made with the same die! Beautiful! She gave her creations away as Christmas gifts! Wouldn't it be nice to be on her Christmas list!?

I love this die! The snowflakes look complicated to make but really they are easy and turn out spectacular! They are pretty stiff once assembled so they can stand up on their own on a shelf or you could hang them and they dangle beautifully. I've seen someone make an entire wreath decorated with these snowflakes.

I love snowflakes for their simplistic beauty, and would frame the real snowflakes if I could, but they do not last, as they melt ... after we ski on them, turning into water, which then evaporates ... and stuff. I'm sure there are many metaphors for life in there somewhere, but all I'm saying is, make a snowflake, it's fun, and they last on your shelf, and they sparkle! That's good enough for me!

Wednesday, January 1, 2014

January 2014 Tag - Playing along with the Tim Holtz tags of 2014

January 1, 2014! Happy New Year!

http://timholtz.com/12-tags-of-2014-january/

I've been playing along with the Tim Holtz Tags for 1 whole year now! That was my new year's resolution last year, to create something every month and I was able to do it. It was tough to find time sometimes, but it was a fun adventure!

This year my artistic new years resolution is to complete all the tags from the Tim Holtz Chemestry 102 course. I'm on my way, but still have the dreaded "alcohol ink" section to go. Alchohol inks are still a mystery to me so I will tackle the lessons as soon as my order of alcohol inks arrive. I have some alcohol ink pens and I'm still trying to figure out how they work.

Here is my January 2014 tag.

I don't have the watch die, but I'm going to budget that one in, along with the circle die to go with it! It would make a nice frame for many projects. I was excited to use my new-found stencil skills for this tag as I have completed the Tim Holtz Chemistry 102 section on stencils! I also have been practicing my paint spattering techniques as my furniture can attest to.

I took some time off work in December to help out with a newborn grand-baby and a toddler, so I've been having fun running all over the place with the little people. During this "time-off" work, I have a new-found appreciation for motherhood and was able to "invent" many items to "save the world" from utter disaster and mayhem. So it's no wonder that I came up with this slogan for my January 2014 tag. During 2014 I look forward to many more opportunities to "invent" as I help my favorite little people!

I also wish I had the embossing folder used by Tim, so instead I used this other folder I have. I made my own chit-chat words that are important to me for 2014.


As I go back to work tomorrow, I look forward this year to finishing up my many software "inventions" at work, and moving on to new work projects. I also look forward to creating many 2014 art projects just for fun. 

A Happy New Year to everyone! Thanks for being my creative teachers and idea people this past year! You have become my creative brothers and sisters related by our common love of the creative arts! We all have similar glue, paint, ink, and dye under our fingernails and we all have similar massive stashes of craft supplies stashed in little containers all over the place!!! I love that about us! You are my people!

Here are some photos I took of my little people!

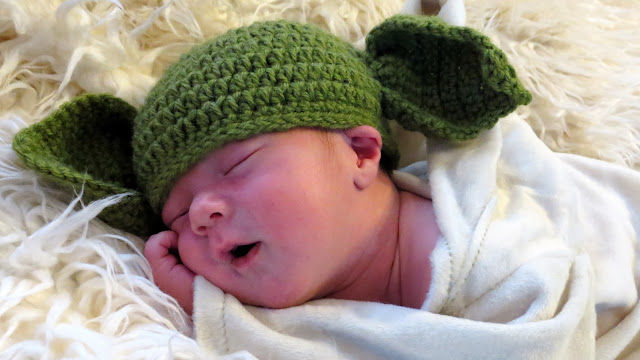
New baby as yoda in the hat I crocheted for him. (He has a baby star wars room)

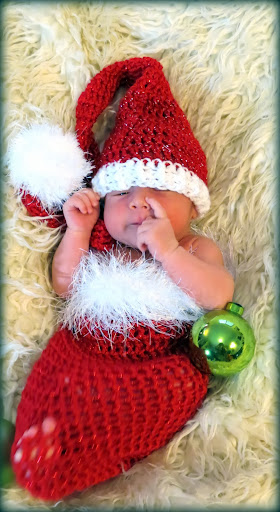
New baby in the Christmas outfit I crocheted for him. 
...He spoke not a word, but went straight to his work,
And filled all the stockings, then turned with a jerk.
And laying his finger aside of his nose,
And giving a nod, up the chimney he rose!

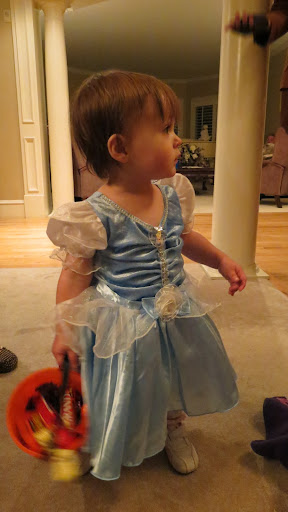
Toddler's first trick-or-treating in a fancy neighborhood.

New grand-puppy "Punkin" the toy poodle. She's very small, about the size of a guinea pig, and moves fast so I will probably never be able to capture a photo of her that's in focus!

My son's band "We are the Strike" performing "God Rest Ye Merry Gentlemen" on tv in December.


http://wearethestrike.com/. Like them on facebook.com/wearethestrike.

Monday, December 9, 2013

December 2013 Tag (Hot Air Balloon) based on Tim Holtz tags of 2013


I've been wanting to try the paper hot air balloon tutorial by Laura Carson at Artfully Musing. I also wanted to try out the December Tim Holtz 12 tags of 2013 tutorial as well.

So I combined the two and created a Tim Holtz Paper Hot Air Balloon with the tattered poinsettia, and the frosted film over the Clearly for Art plastic!


There is a paper hot air balloon template on the Artfully Musing blog that I used to cut out the sections of the balloon. Check out Laura's crazy paper hot air balloons on her blog. They are unbelievable! Laura also has a video tutorial you can watch that is helpful.
Here are my hot air balloon sections. I used the seasonal Tim Holtz red and white paper pad "Merriment".

So first I prepared all the sections of my paper hot air balloon using the pattern. I used glossy accents to glue each segment together. It's kind of tricky, but I followed the instructions on the video tutorial and it worked pretty well.


I used a tart tin for the balloon basket, poked holes in it with nails, and put some wire through the holes. It was my first hot air balloon attempt, so after this attempt I learned that there are probably some better ideas than my own on how to attach the balloon to the basket that I will try next time. Then I heated and molded the 2 largest tattered poinsettia pieces with frosted film on them around the tart tin to make the basket covering. Then I glued it on the basket. I coated the reverse side of the clearly for art with distress paint and let it dry before I heated it to mold it around the basket. Then I made a poinsettia using the smaller pieces and stuck it on the bottom as well.


I used some beads and ribbon to hang up the hot air balloon. There is a bead on the top of the hot air balloon, and some beads inside to hold the ribbon hanger in place. Next time I will add the ribbon and beads BEFORE I finish gluing all the pieces of the hot air balloon together as you can't get your fingers inside the balloon afterwards %#$!

Then I strung on a santa bead and a bell bead onto the ribbon to hang down the center. The basket is the right size to hold a battery votive candle!


So that's my attempt at combing two great tutorials and I love my paper hot air balloon, even though it's a little goofy. (That's what mica glitter is for, to cover up the goofiness). I am also very happy that I completed an entire year of 12 tags and have learned a lot!

Thanks to Tim Holtz and Laura Carson for their great tutorials! I have had tons of fun this year making lots of creative stuff and trying out new mediums that I would have never tried!

Merry Christmas!

Sunday, November 17, 2013

Spooky Halloween Mini Hutch Altered Art Shrine

It's well into November so I'm a little late finishing my Halloween mini-hutch project but here it is. It's very spooky and loaded with treasures. The mini-hutch base is from Alphastamps. They had a mini-halloween hutch swap that looked interesting. I started my project after their swap was over, but I was inspired by all of their entries in their mini-hutch swap gallery. Their entries enticed me into working on that blank hutch I'd purchased several months ago. I'd already made some spooky treasures with no home yet.


The hutch kit pieces fit together with some tabs that you glue into place. The kit comes with the hutch, a bat, and 3 skull cutouts! I painted the hutch, then papered and glittered it! The dragon/monster is a jewelry charm. The tiny jars are filled with glitter. I used halloween tissue tape for the jar labels. The table is a small spool with wire. There is a bat flying on the wire.

Here's the back of the hutch. I filled it with just as much spooky stuff as the front. 

I made the candles out of polymer clay. I made the pumpkin following a tutorial from miniature artist Caroline Mcfarlane-Watts. The orange skull is a ceramic bead and I added the chain fringe. The candles are attached to a dollhouse platter, and the black chain is attached to the platter handles. The cauldron-looking flagpole holder is just a small wooden knob-like item found in the craft store near all the packages of small wooden shapes.

Here's the side of the mini-hutch. The little girl graphic is from a collage sheet from Alphastamps. 


Here's the other side of the mini-hutch.

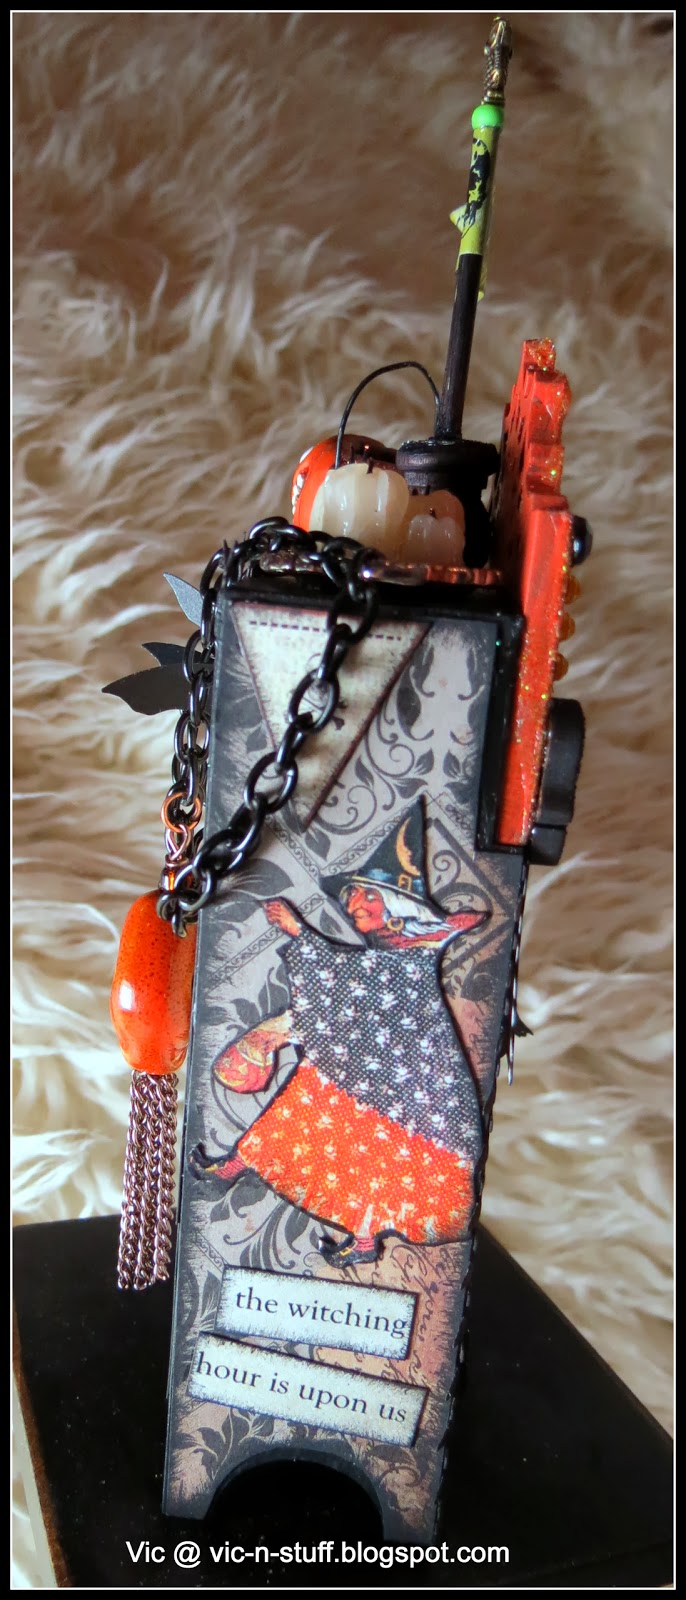
This witch is from another collage sheet from Alphastamps. You can see the fringe on the orange ceramic skull bead from this angle.


I made a flag for the top out of a wooden skewer painted black. The flag is some tissue tape. I topped it off with a green bead and owl bead on a headpin that I cut off and glued on the top.

Here's a close up of the scary items.


The paper trim is from the Tim Holtz die called Ironwork Gate. After I die-cut it from cardstock I just snipped off pieces that I needed, painted them black, and glued them on. The die makes great trim.

I really enjoyed making the hutch so my next project will probably be a Christmas hutch of some kind. The finished size is only 2 3/4" X 5 3/4", so it's not very big. I enjoyed making this project because it wasn't overwhelming as it was small and gave me somewhere to display all the tiny treasures I had created.

http://www.alphastamps.com/p14331/ATC_Hutch_Kit_-_Halloween/product_info.html
So Happy Belated Halloween from my spooky cupboard! Make one, its lots of fun!

Thursday, November 7, 2013

November 2013 Tag based on Tim Holtz tags of 2013

http://timholtz.com/wp-content/uploads/2013/11/novembertag.jpg

Here is my tag based on the November Tim Holtz 12-tags-of-2013 tutorial. I was excited to play with chalk because I'd never tried that technique yet from the Chemistry 102 course. So I got out the old school chalk and was ready to try some fingerpainting!

It turned out pretty cool and wasn't hard. I was expecting it to be hard because everyone said it would take lots of trial and error, but the tutorial worked great for me. Here's what I did. I had some cool vintage-looking manila folders from Hobby Lobby, the package said Fiddlestix Paperie. I used the Tim Holz Mover's and Shapers Tag and Bookplates Die to cut out some tags. Now I have some really cool bookplates to go on another project too!


Then I got out some Americana chalkboard paint, and used my fingers to paint an area on the tags. Pretty messy but enjoyable. I painted on two coats. Then I let it dry overnight. Hey, see my cool glass owl place-mat for my spot at the kitchen table so I won't keep ruining my table/tablecloth with my painting projects. I have other places I could paint, but I always seem to like to paint at the kitchen table where more stuff is happening.


Then I stamped using Ranger Distress embossing ink, and poured on the ranger antiquities Frosted embossing powder. I heated it up carefully because I was afraid the chalkboard paint might bubble or melt, but it didn't. I didn't hold the heat gun too close and waited until the embossing powder just barely melted.


Then I got the side of the square chalk and just drew on the embossed image and it worked great! The tutorial worked like a charm. This was my first time trying out the antiquities embossing powder. I'd never heard of it before.

So my tag turned out pretty cool! No blunders this time. I'm hoping to finish up the other two and see if they turn out as well. I think it helped that I was using white cheap-o pastel chalk that is a little softer than school chalk.


Excellent tutorial! I'm learning so much from the 12-tags tutorials and all of the creative tutorials people post! Thanks!

This is the first time I used a stamp from my new stamp set from Chocolate Baroque. I'd ordered the stamp set forever ago, but my order got lost in the mail from England to the US. They were kind enough to send a replacement set. Whew! The set is called Fancy Flowers.

Here's the second tag I created with a Christmas theme. I used embossing enamel this time and didn't use chalk. It's kind of glopy and lumpy, but has a slight shimmer that you can't see in the photo. Very vintage looking.


Even though I'm displaying a Christmas tag, Have a Happy Thanksgiving!

Hey, I found out some of my ancestors came over on the Mayflower, so I will be celebrating it with reverence this year in gratitude for all those who made it possible for me to be here!

Related Posts Plugin for WordPress, Blogger...