I am participating in Challenge 19 of the
Compendium of Curiosities iii Challenge on the Studio L3 blog by Linda Ledbetter. For
Challenge 19 we are using the
Tim Holtz Eclectic Elements Fabric and the frayed fabric technique as found on page 66 of
Compendium of Curiosities 3 by Tim Holtz.
Challenge 19 is sponsored
by
Inspiration Emporium who will provide a $50 shopping spree for the winner of the challenge, with more prizes courtesy of
Tim Holtz and
Mario Rossi for the fabulous Curiosity Crew's choice winner!
For this challenge I wanted to make something cool using many of the Eclectic Elements fabric designs all incorporated into one fabulous project. Since I know how to sew, I decided since this is a fabric challenge, I would sew a fabulous 18" doll dress made entirely of Tim Holtz Eclectic Elements fabric using a
vintage reproduction doll dress pattern from Butterick.
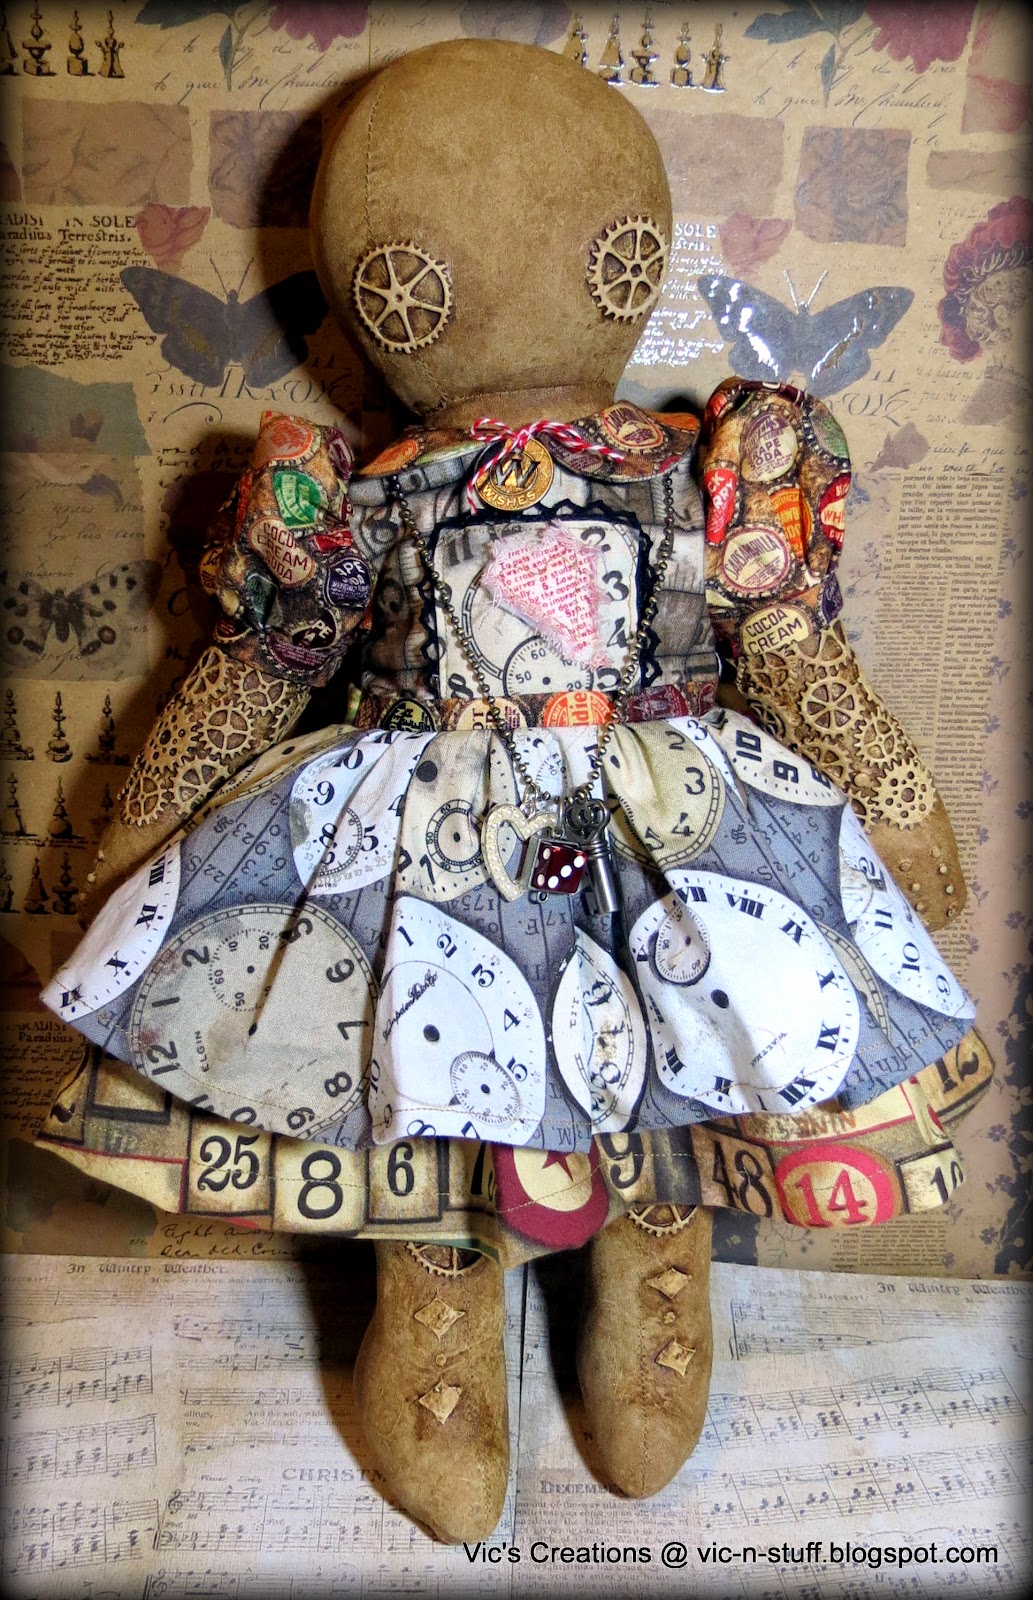
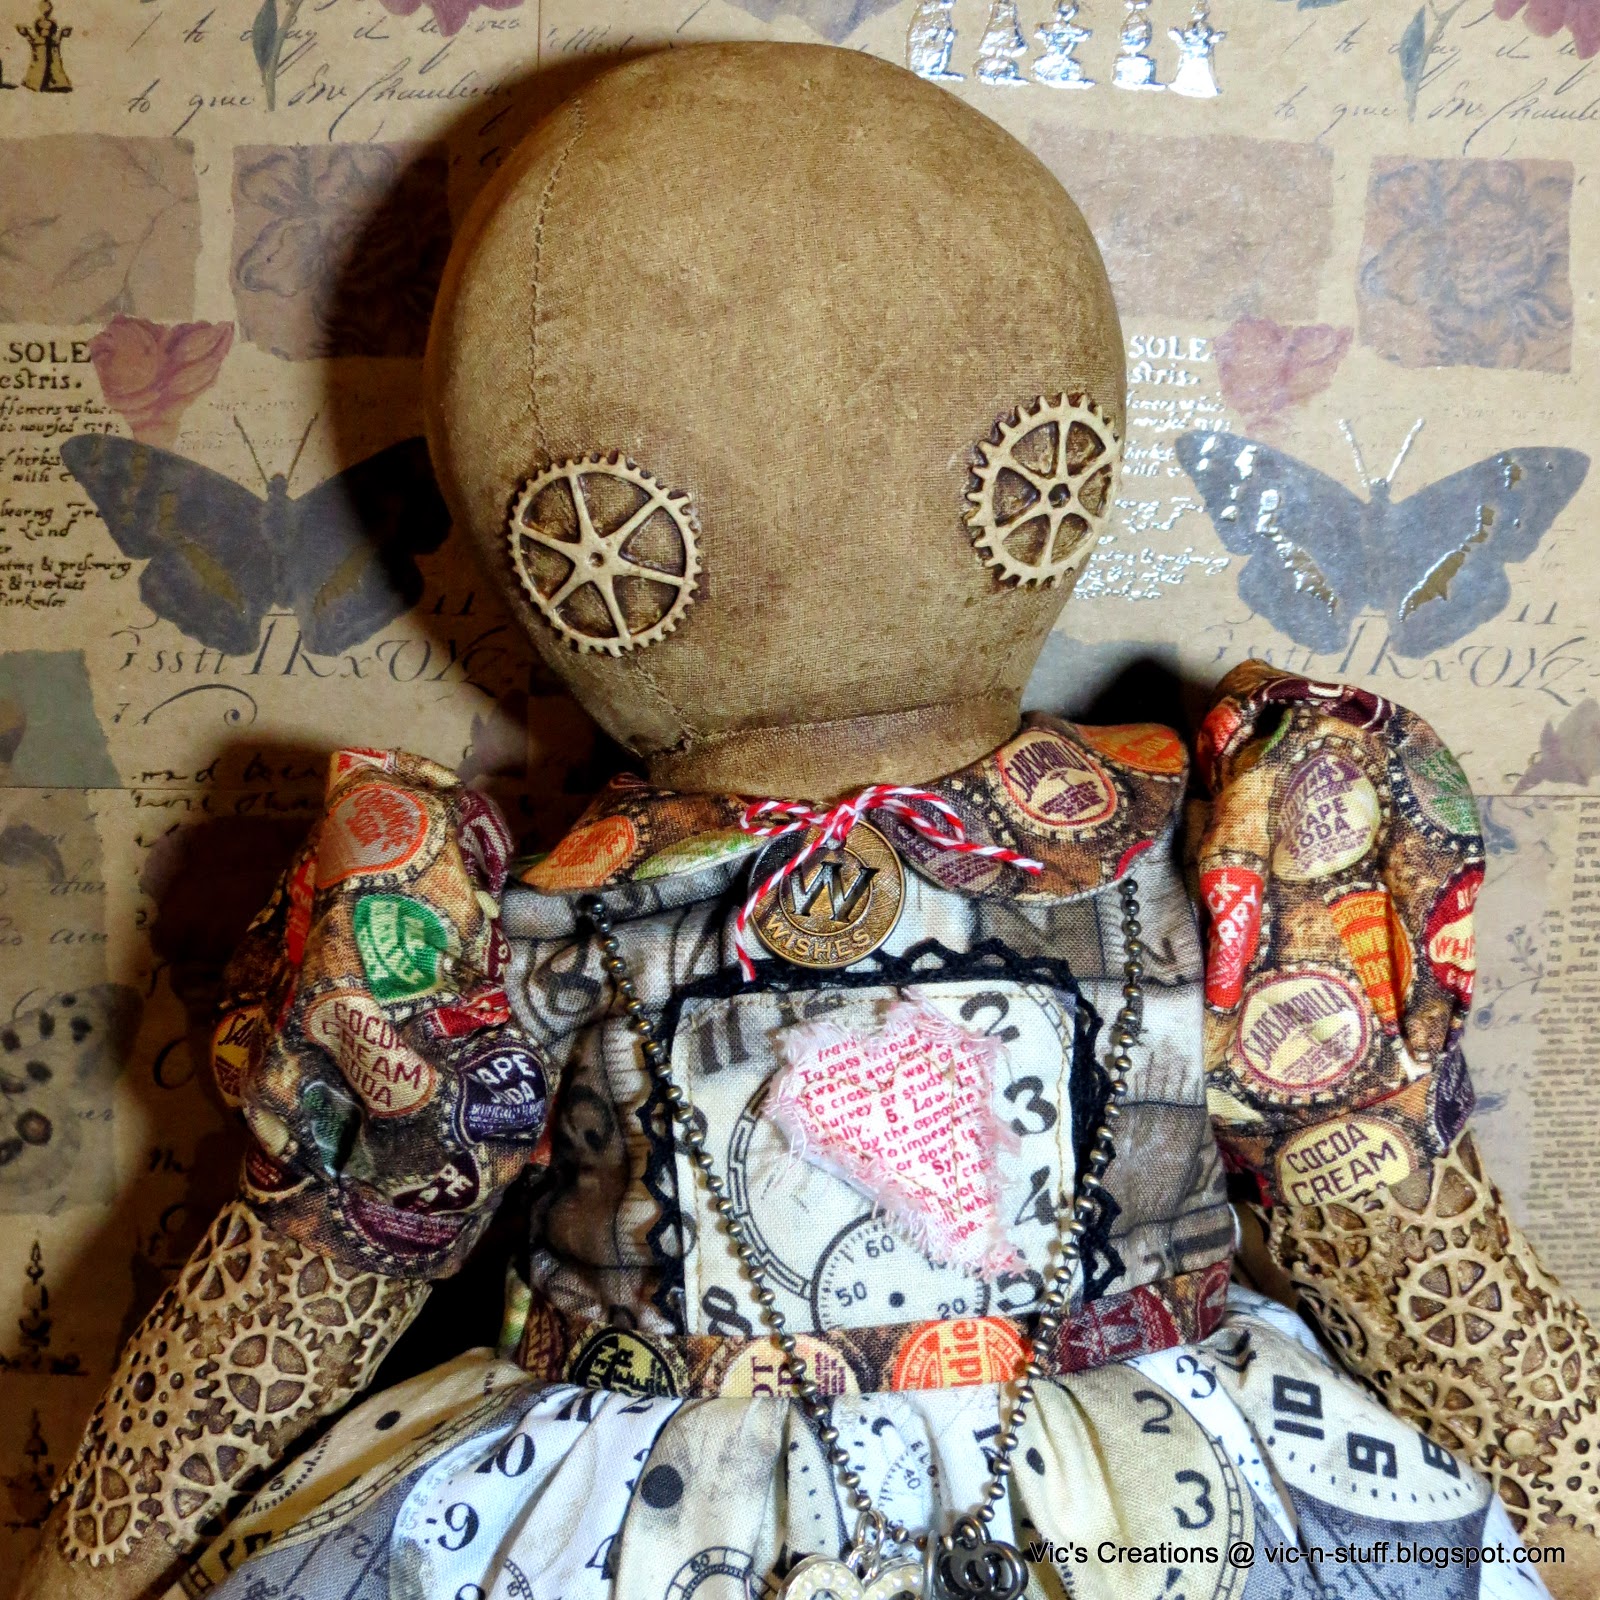
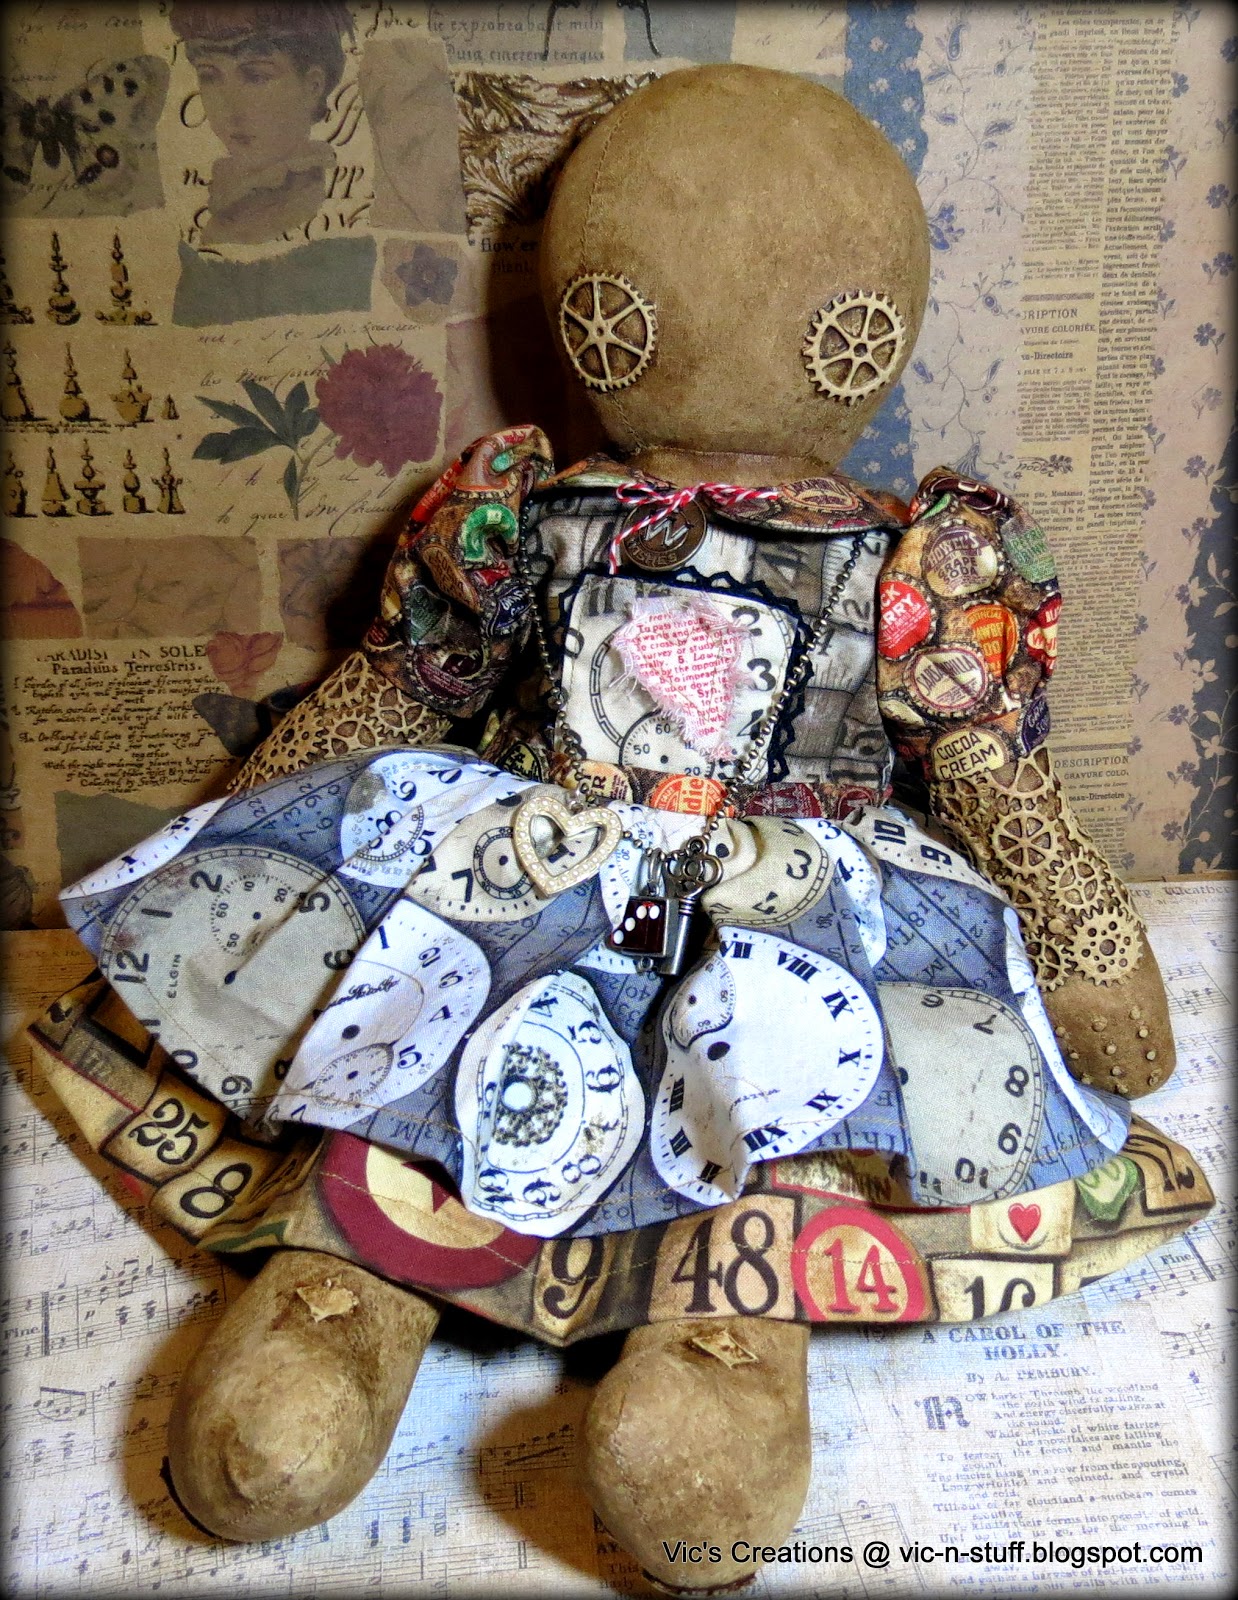
I have been working on an 18" Steampunk dolly that I have named "Eclectic Ellie" who will be modeling my designer dress. "Eclectic Ellie" is not quite done, as she does not yet have a face...or hair, but since she's Eclectic, it all works!
Here is Eclectic Ellie modeling the dress!
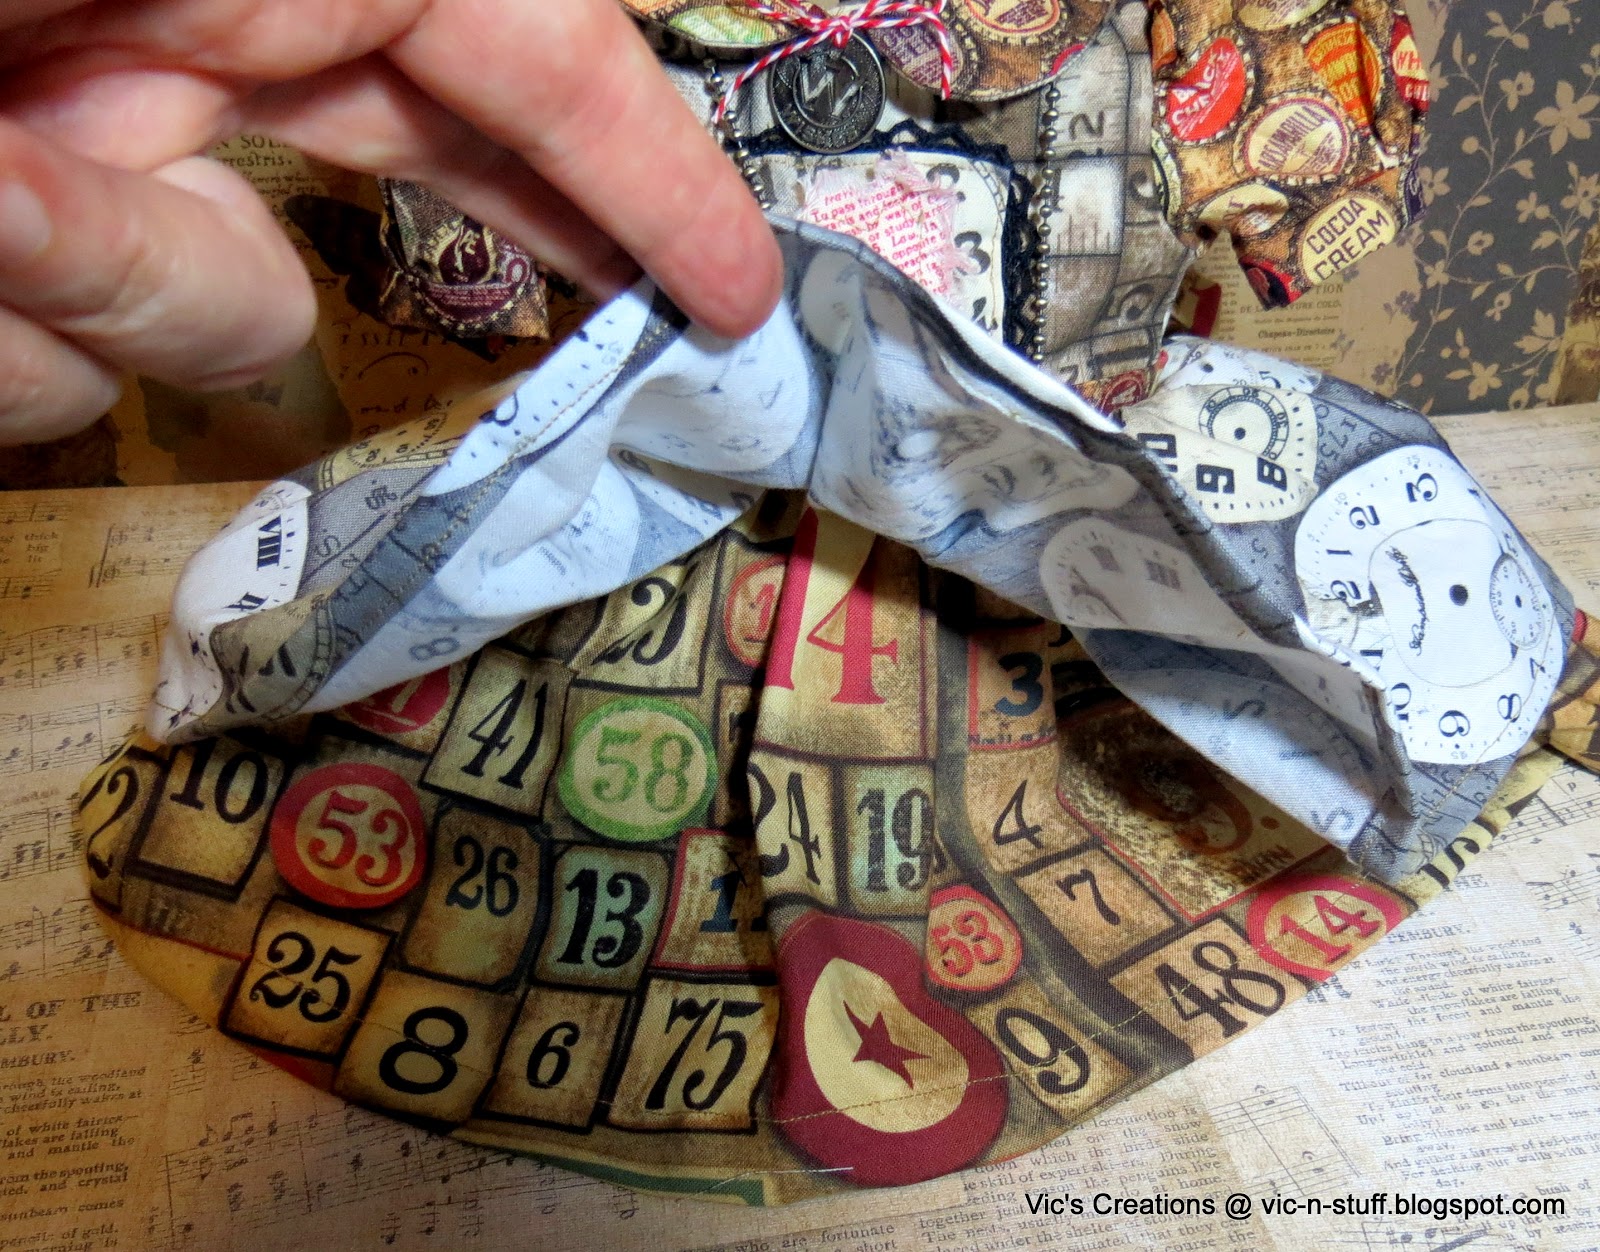
Here is a close up of the Frayed Fabric technique on the front dress pocket.
I wanted to show that you can take a cutesy 1950's doll dress and using Tim Holtz Eclectic Elements, it turns all hip and modern, but still vintage and retro.
My dress is the same pattern as this:
But look at what I did to it:
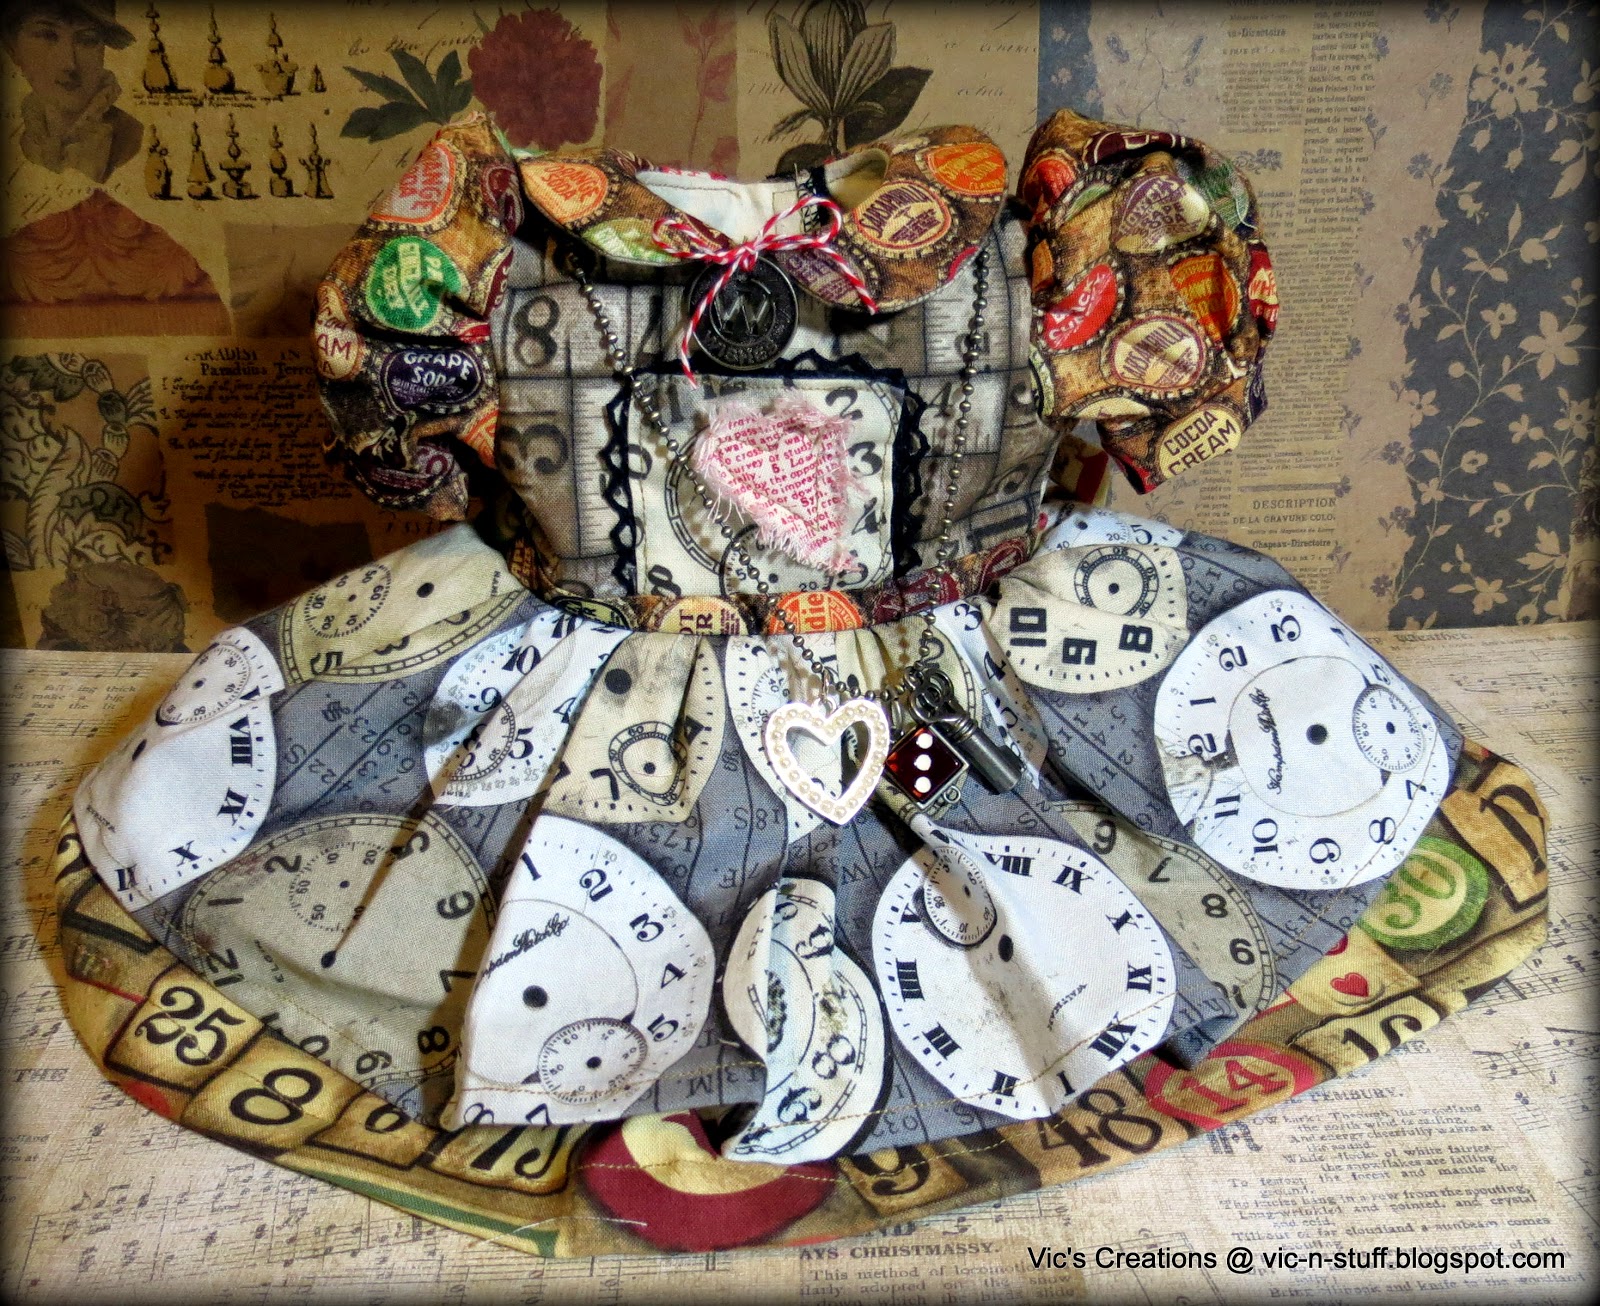
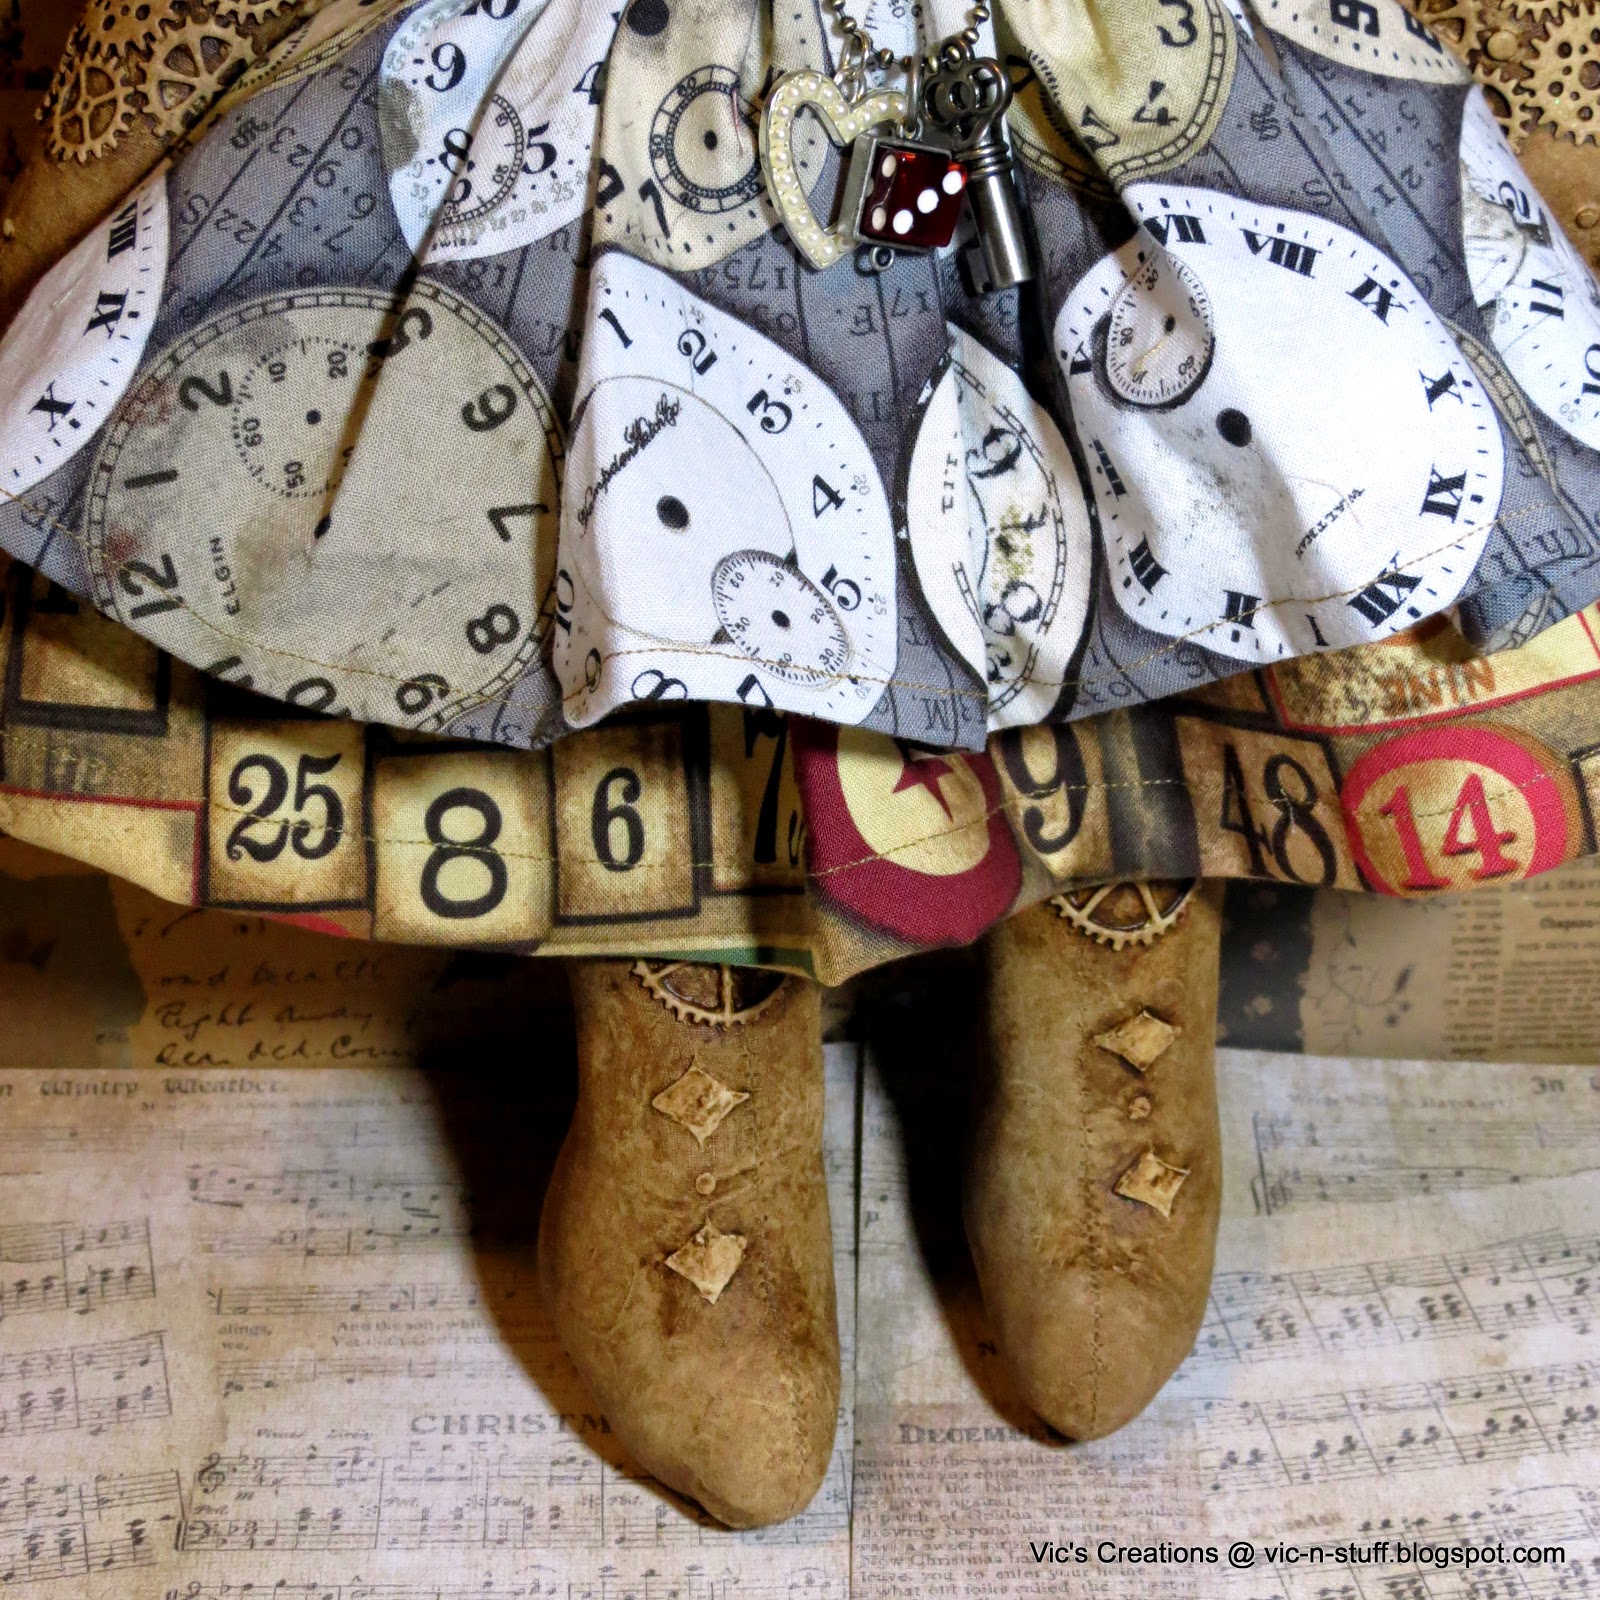
I love the bottlecap design on the sleeves, collar and waistband.
I also love the bow tie in the back in the contrasting design, same as the underskirt.
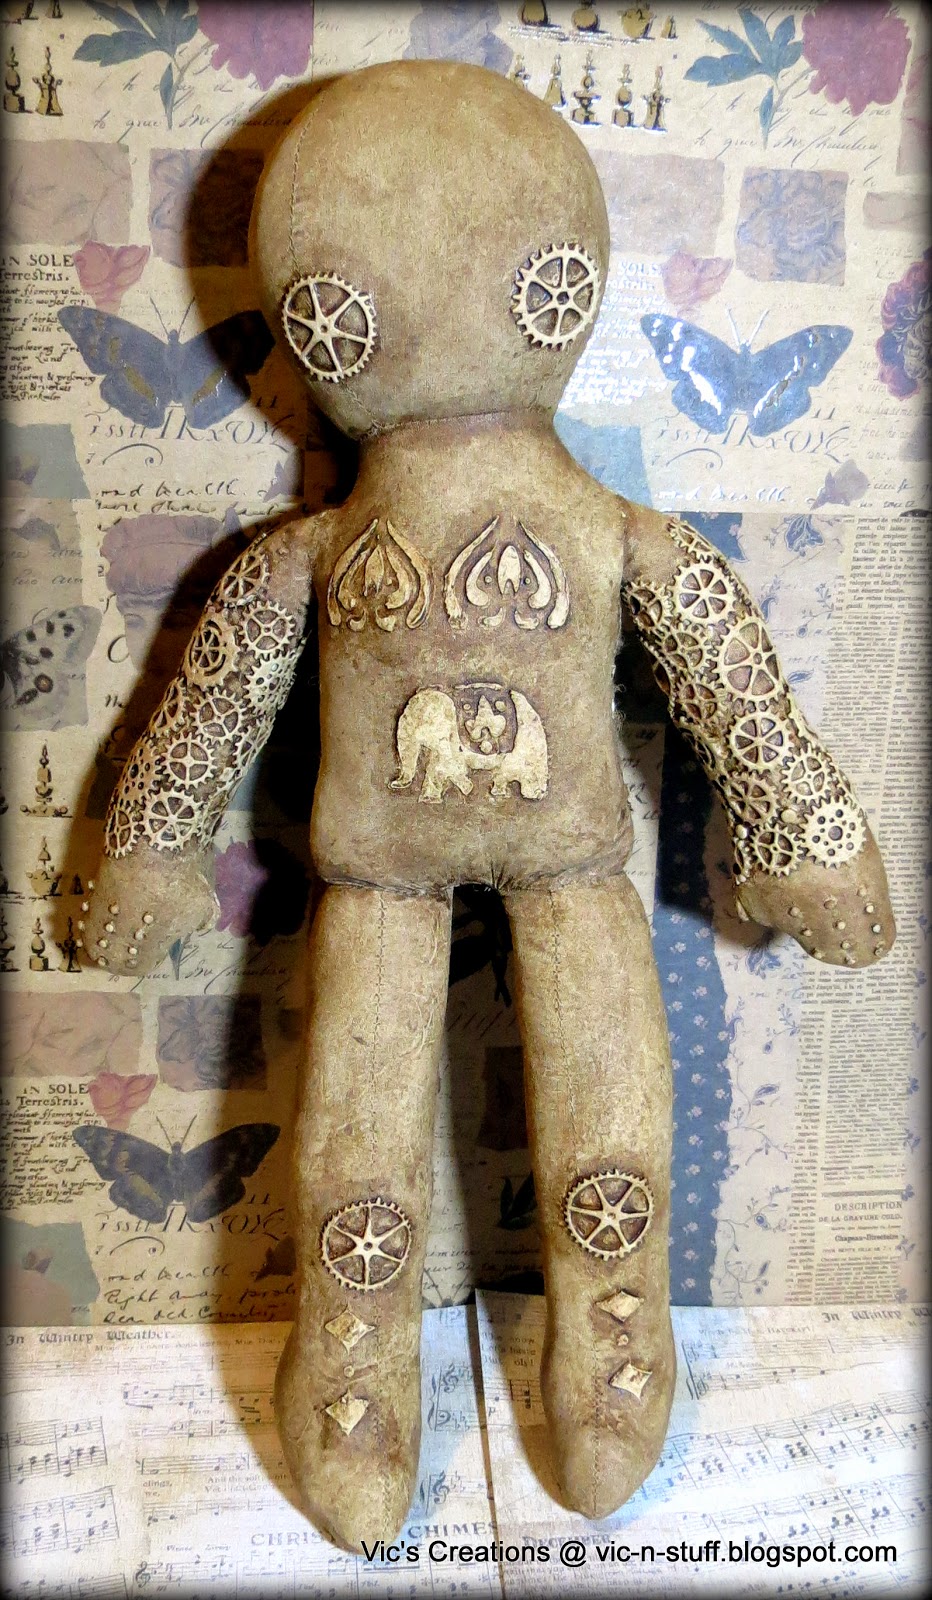
Here is "Eclectic Ellie". She's an 18" doll form that I'm decorating with dies, stencils and paint.
Yes, that is an elephant on her tummy. She's feeling a little bloated. LOL!
This is her, um, back-side, and spine.
Eventually she will have a face and rosy cheeks. Oh, and some hair. Probably fabric skeewampus hair. Maybe some fabric dreadlocks, not sure yet.
Oh, I wanted to show you her knees.
So thanks for checking out my project!
Since most of the participants say they don't really sew, I wanted to show you all something slightly different that you can do with a normal doll dress pattern and Tim Holtz Eclectic Elements Fabric, and a simple pre-made doll form that you can buy at a craft store. It's all art, just the same, just a different canvas, and a different medium.
It's amazing how the Tim Holtz Fabric totally changes the look of the dress and it suddenly becomes art instead of a toy.
Do not feel bad if you are not a sewer! What all of you make look so simple I have to work so hard at. But this I can do...
I learned to sew when I was 13 years old thanks to my best friends mom who worked in a fabric store. She gave us a sewing machine, old fabric, and discarded patterns and left us on our own. My friend immediately sewed through her finger, nothing serious, just got the side. We made some extremely ugly creations, lopsided dresses, 70's pant suits with zippers on the behind (talk about a wedgie), and some really horrible swim suits. Eventually we figured it out!!! Through trial and error, no classes, and no instruction from anyone! It was a simple singer sewing machine with only a straight stitch. My parents then got me a simple sewing machine too, which I used until it quit working a few years ago.
I will post again when I finish up "Eclectic Ellie" and then I can post a tutorial on the doll. It's pretty simple. I used a gear die with craft foam and glued the gears on the doll, used some stencils and stencil paste, painted the whole doll with acrylic paint in a lighter skin color, then antiqued over the entire doll with a brown antiquing medium. That's it.
The dress will fit any 18" doll, but I'm liking the dress on "Eclectic "Ellie"!